
The goal of the selfie camera component is to capture the picture with face detection with position and lighting.
Below is an example of how to use the Selfie camera component.
Step 1: Select a selfie camera component from the left panel and add it to the canvas.
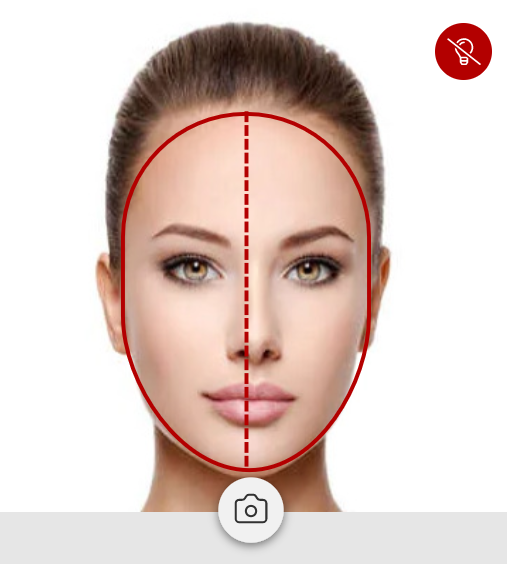
Step 2: After that, the front camera will open and the indicator will display the face position and the light of your background.
In the below screenshot, the red frame around the face indicates that the face position is not proper. And the red blub in the top right corner indicates that lightning is not good in your background.
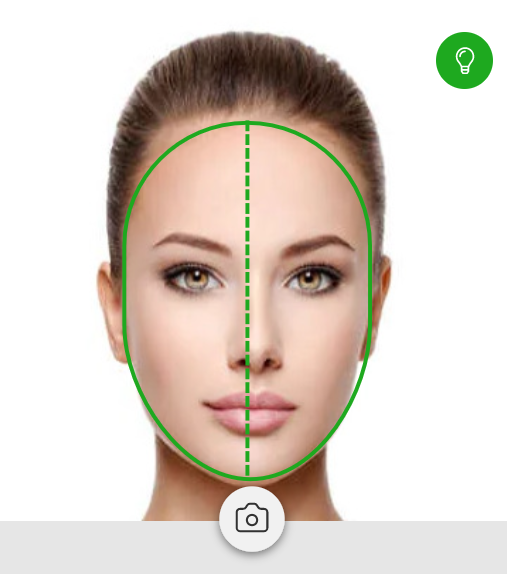
The frame and blub will be turned green if the position and light are correct.

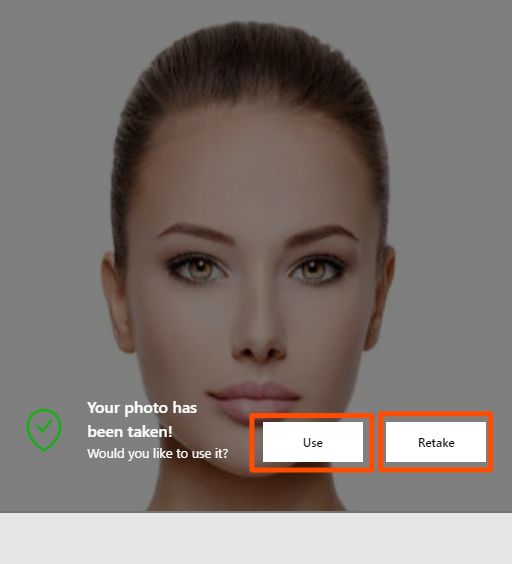
Step 3: After capturing the image, you will see the captured image in the element with the "Use" and "Retake" button.
Use Button:
-
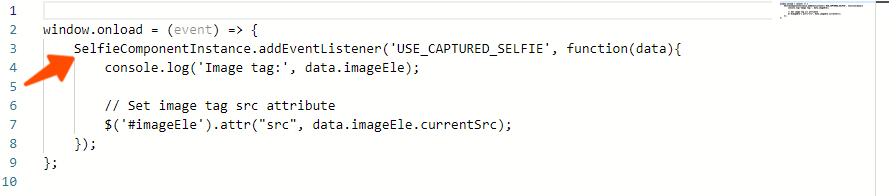
At the click of the "Use" button, you will receive one event ''USE_CAPTURED_SELFIE". So you have to listen to that event which has an image element so that you can use that captured image wherever you want.

Retake Button:
- With the click of the "Retake" button, you can able to click the new picture and your old picture will be lost.
Customization of the Selfie camera component
1. Auto Selfie Detection:
The selfie camera has a setting for auto-detection in the right panel's content bar called "Auto Selfie Detection". By default, it is turned on, which means that after dragging and dropping the component, the component will automatically begin face position and light detection once the camera is turned on.
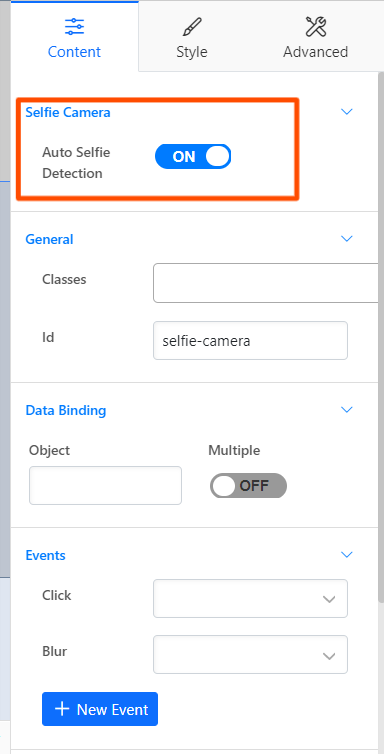
If the flag is turned off, the component will not detect the face position or light detection after being dragged and dropped. To accomplish this, the user must manually subscribe to the library using the component's subscribeSelfieVerifier() function.
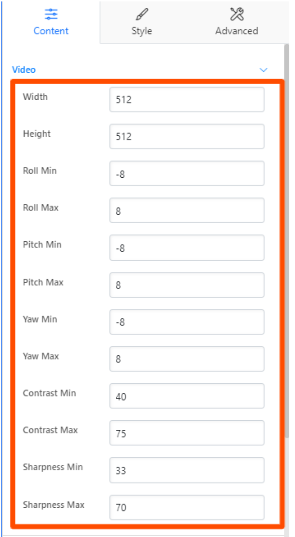
2. Selfie Verifier Settings
You can customize the value of the face and light detection settings from the right panel after selecting the video element. The below screenshot displays the default settings value for the face and light detection.
Below are listed the events and APIs which are exported by the Selfie camera component.
List of events that are exported by the Selfie component:
| Event Name |
Data (Passed with the event) |
Description (When event will be fired) |
|---|---|---|
| IMPORTING_SELFIE_COMPONENT | { isImported : false } |
Event emits when started importing the component |
| IMPORTING_SELFIE_COMPONENT | { isImported : true } |
Event emits when done importing the component |
| SELFIE_VERIFIER_VALUE_CHANGED | {
isLightValid: light,
isPositionValid: silhouette,
}
|
Event emits when subscribe to the selfie verifier library and the library started giving the value of light and position |
SNAP_BTN_CLICK |
- |
Event emits when click on the "Snap" button to capture the picture |
USE_CAPTURED_SELFIE |
- |
Event emits when the "Use" button clicked |
OPTION_CHANGED |
{ selectedOption: selectedOption } |
Event emits when the user changed the option ABCD - Basically for changing the default value of the pitch, raw for the selfie verifier library |
Use of the event:
List of APIs that are exported by the Selfie component:
| Function Name | Description |
|---|---|
| subscribeSelfieVerifier() | It helps in subscribing the selfie verifier library |
| setImage(imageSrcUrl) | it helps to set the image in the Image tag of selfie camera component |
| retakePicture() | Provide the functionality of retaking the picture |
| onChangeOption({ selectedOption: A, contrastMinValue: -1, contrastMaxValue: 1, sharpnessMinValue: -2, sharpnessMaxValue:2, }) |
Provide the functionality to change the value of the selfie verifier's default configuration |
Use of the API:

Remove the Selfie camera component
There are two options for removing the selfie camera component from your site.
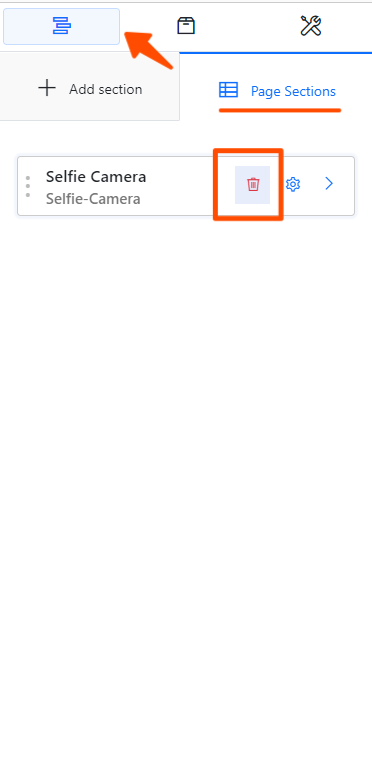
- You can remove the selfie camera component from the page section of the left panel's sections tab.
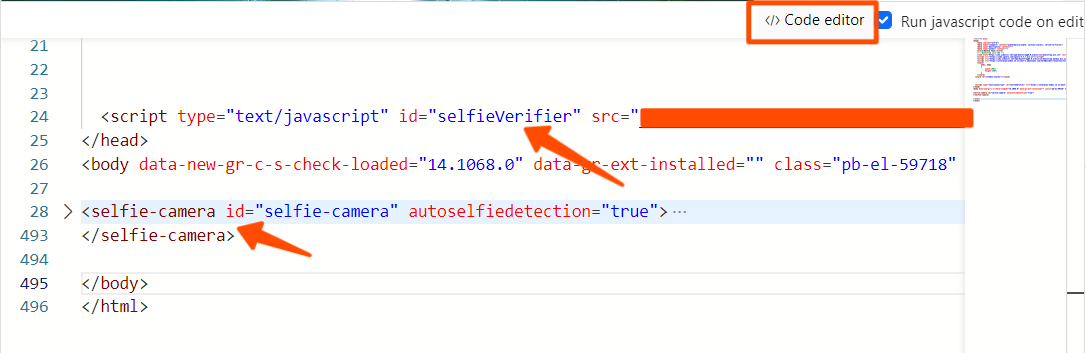
- If you don't see the Selfie Camera in the page section, remove it from the code editor.
- In the code editor, you need to remove <selfie-camera></selfie-camera> and all the code between this tag. And the "selfieverifier" script from the head tag.
- In the code editor, you need to remove <selfie-camera></selfie-camera> and all the code between this tag. And the "selfieverifier" script from the head tag.
Demo video of Selfie camera component usage