
The objective of creating this page is to give a demo/example of how to use a page builder to create a website. Here I have created a basic contact form using the page builder. Have a look below.
Please read through this document for an overview of page builders before you begin reading.
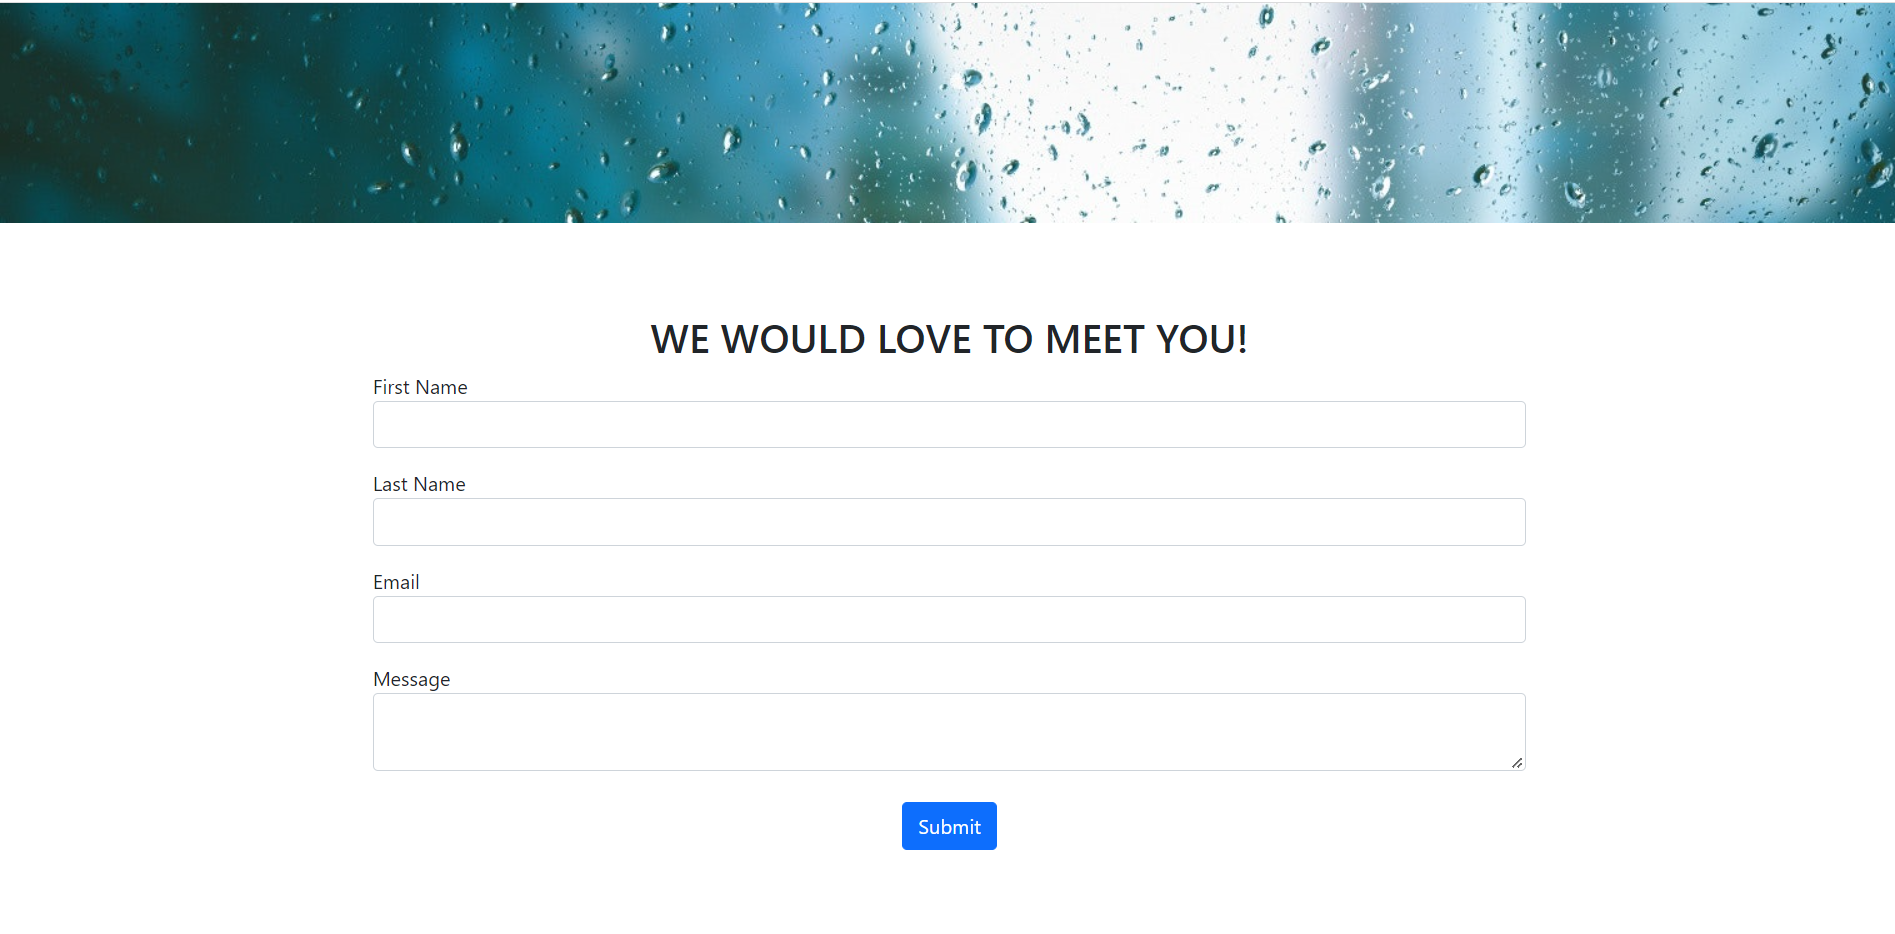
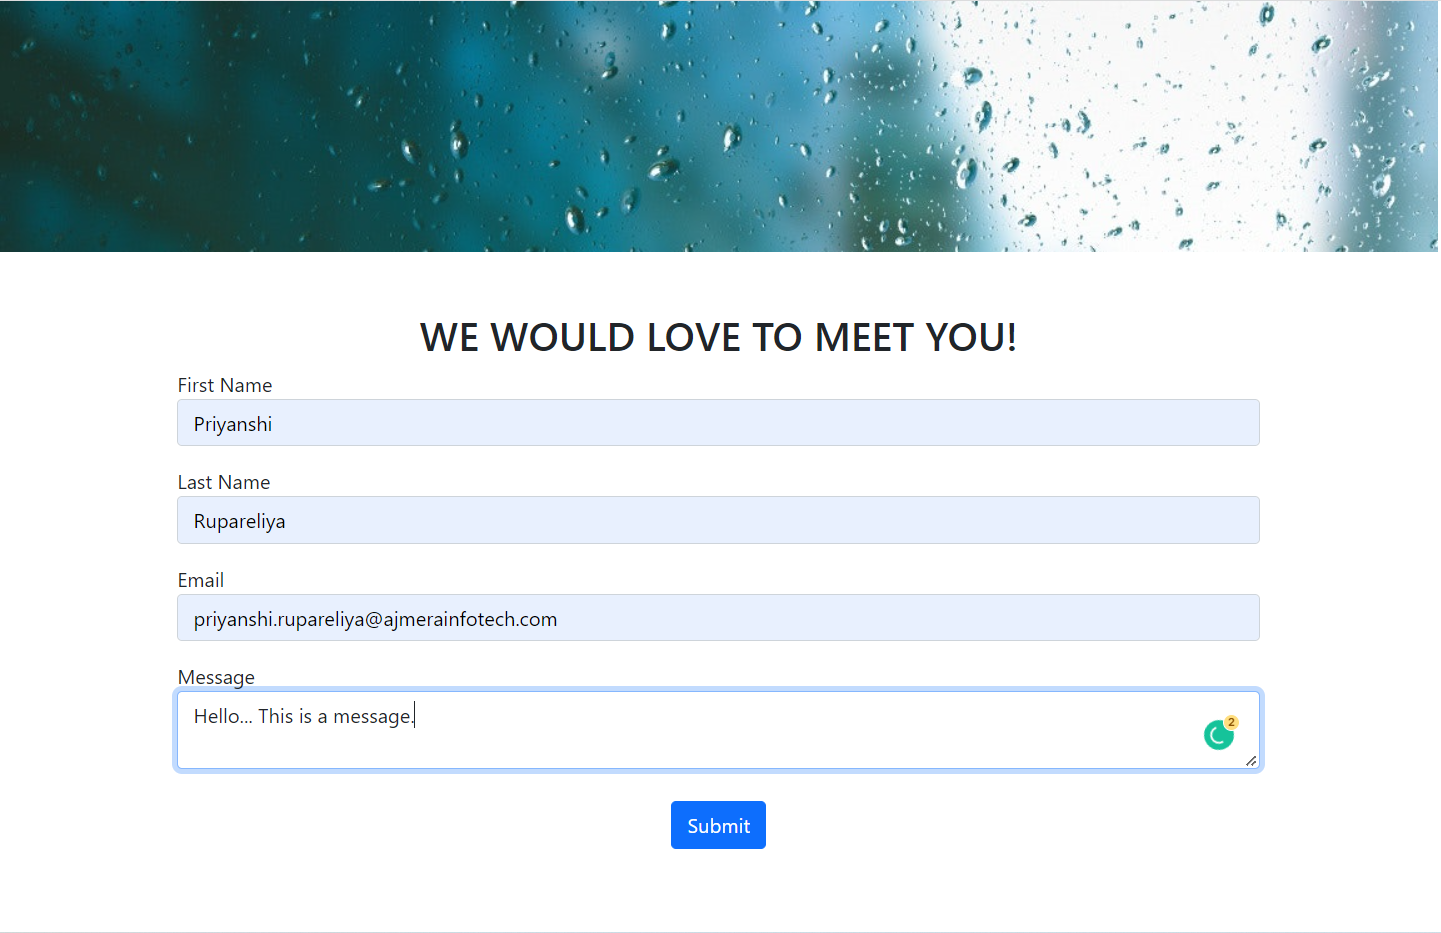
Example: Contact form with thank-you page
Here, we've created two pages: one for a contact form and another for a thank you page that will appear if the form data is successfully submitted. Please see the images of the contact form page and thank you page attached below.

You can watch a video of the form being created at the bottom of this page or read the documentation below.
Step 1: Begin with the contact form page by selecting a page builder node and completing the page settings with the blank theme and template and then save the data. Then clear the existing sections from the 'Page Sections' of the Sections tab from the left panel.
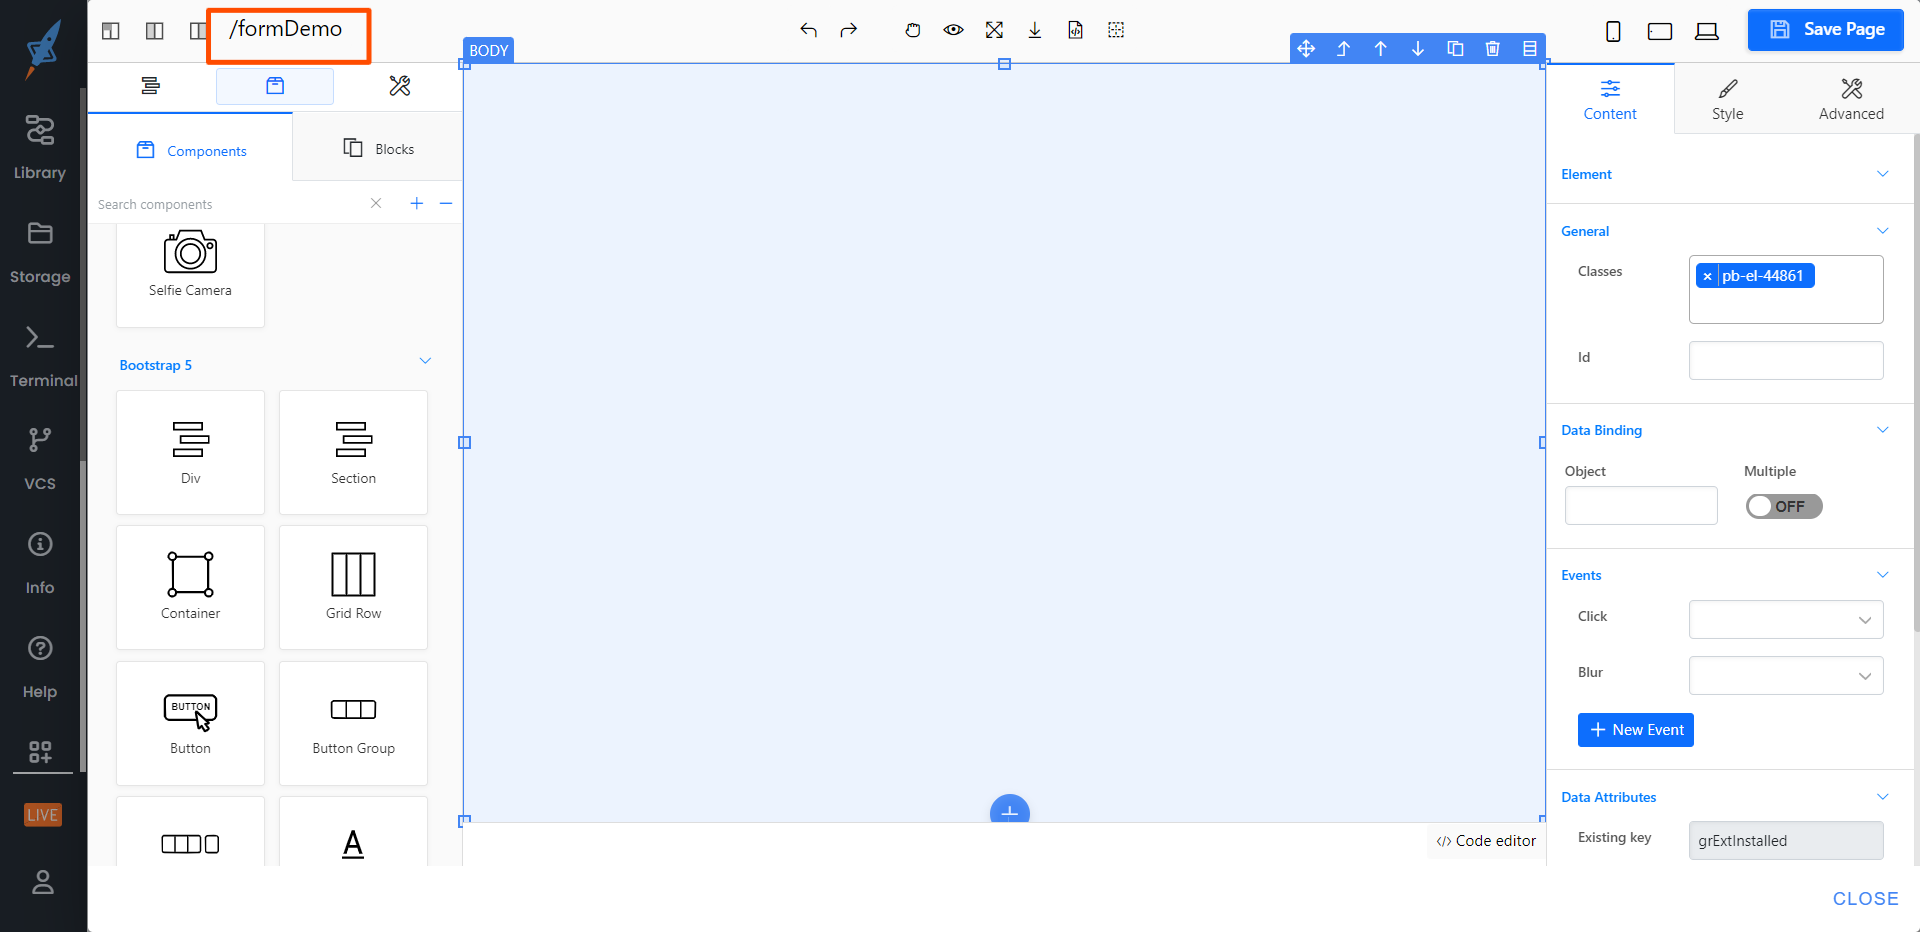
Step 2: As you can see on the contact form page above, we have two sections, the first one is a div with the background image and the second one is a form. So, from the left panel's components tab, select the section element. To make the section fit the screen, change the width to auto in the style tab.

Same as above select a div in the section to make it more convenient for the styling and make width auto.
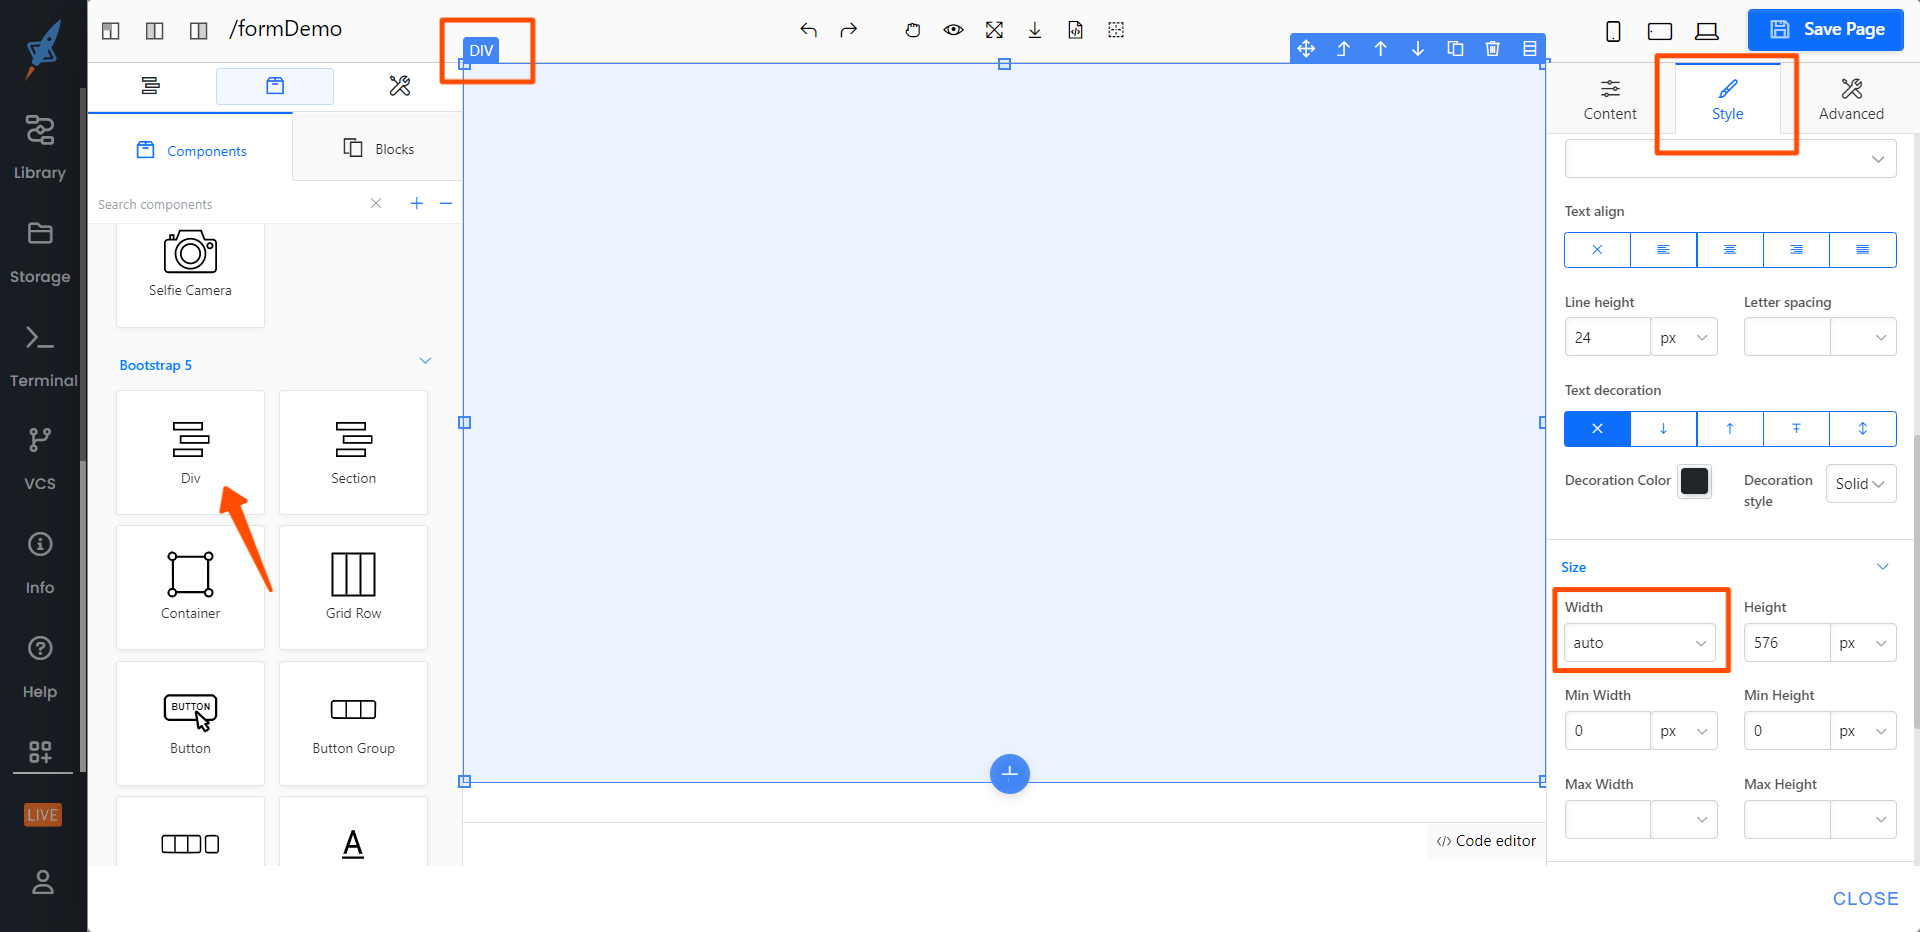
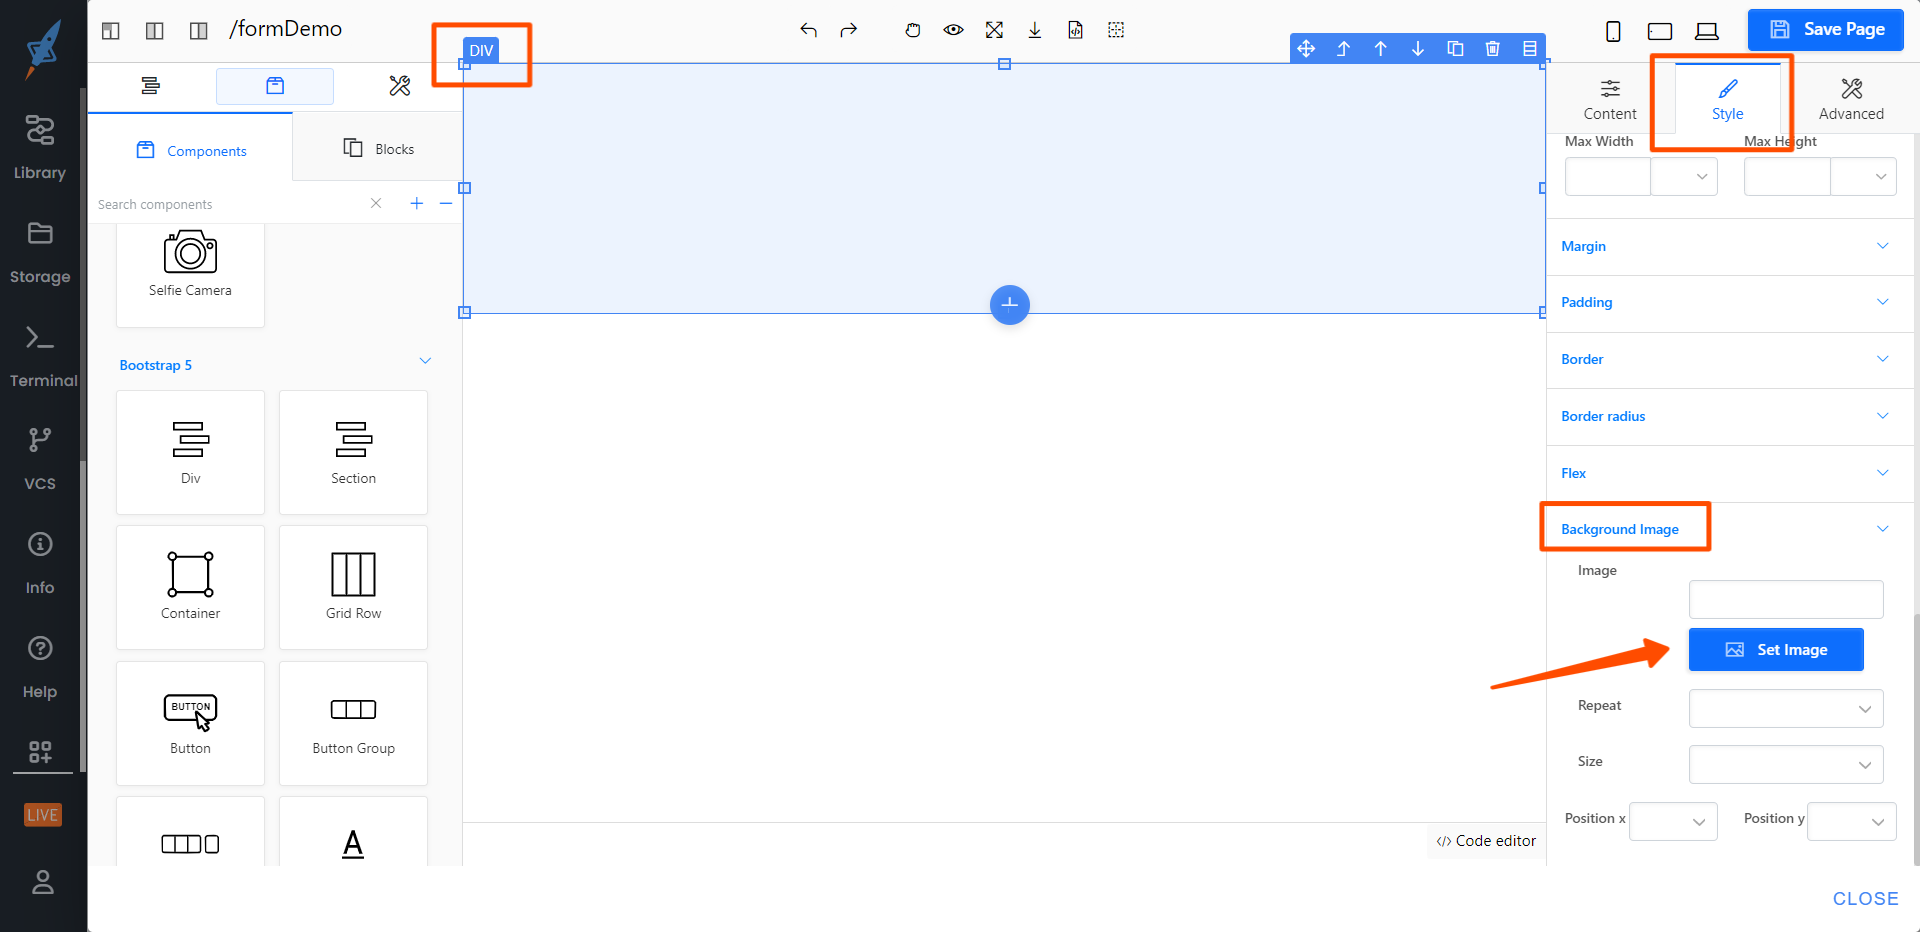
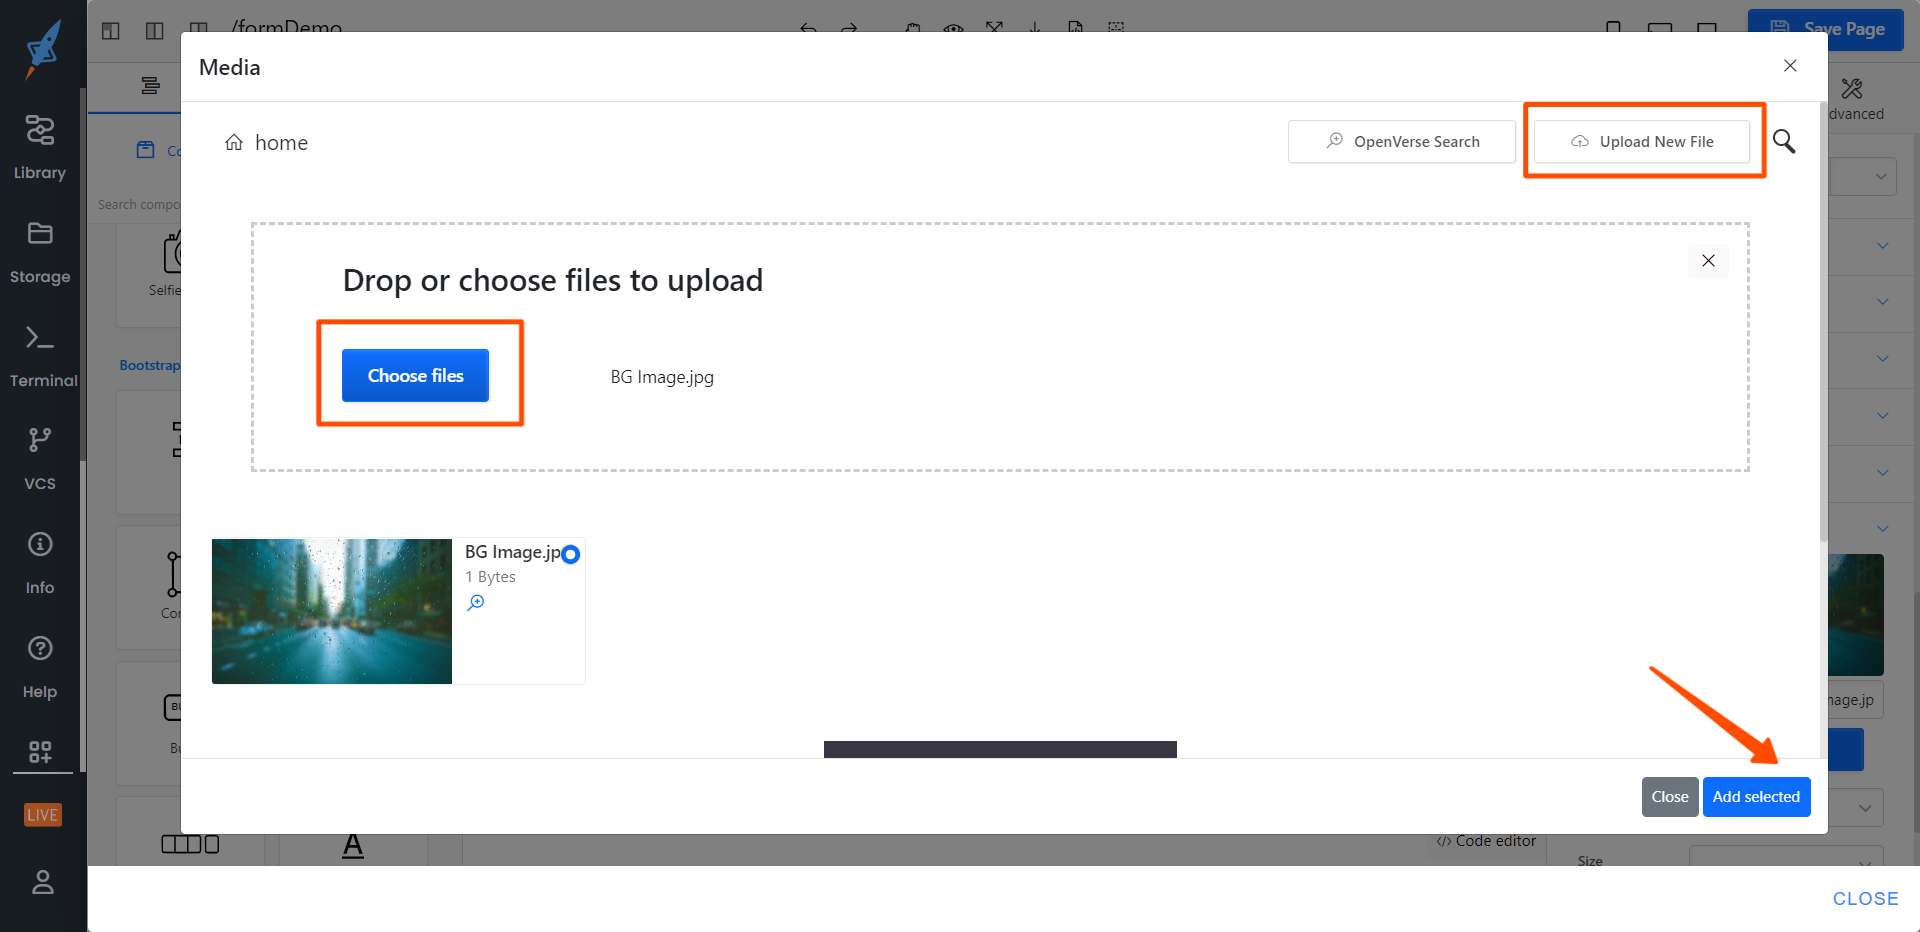
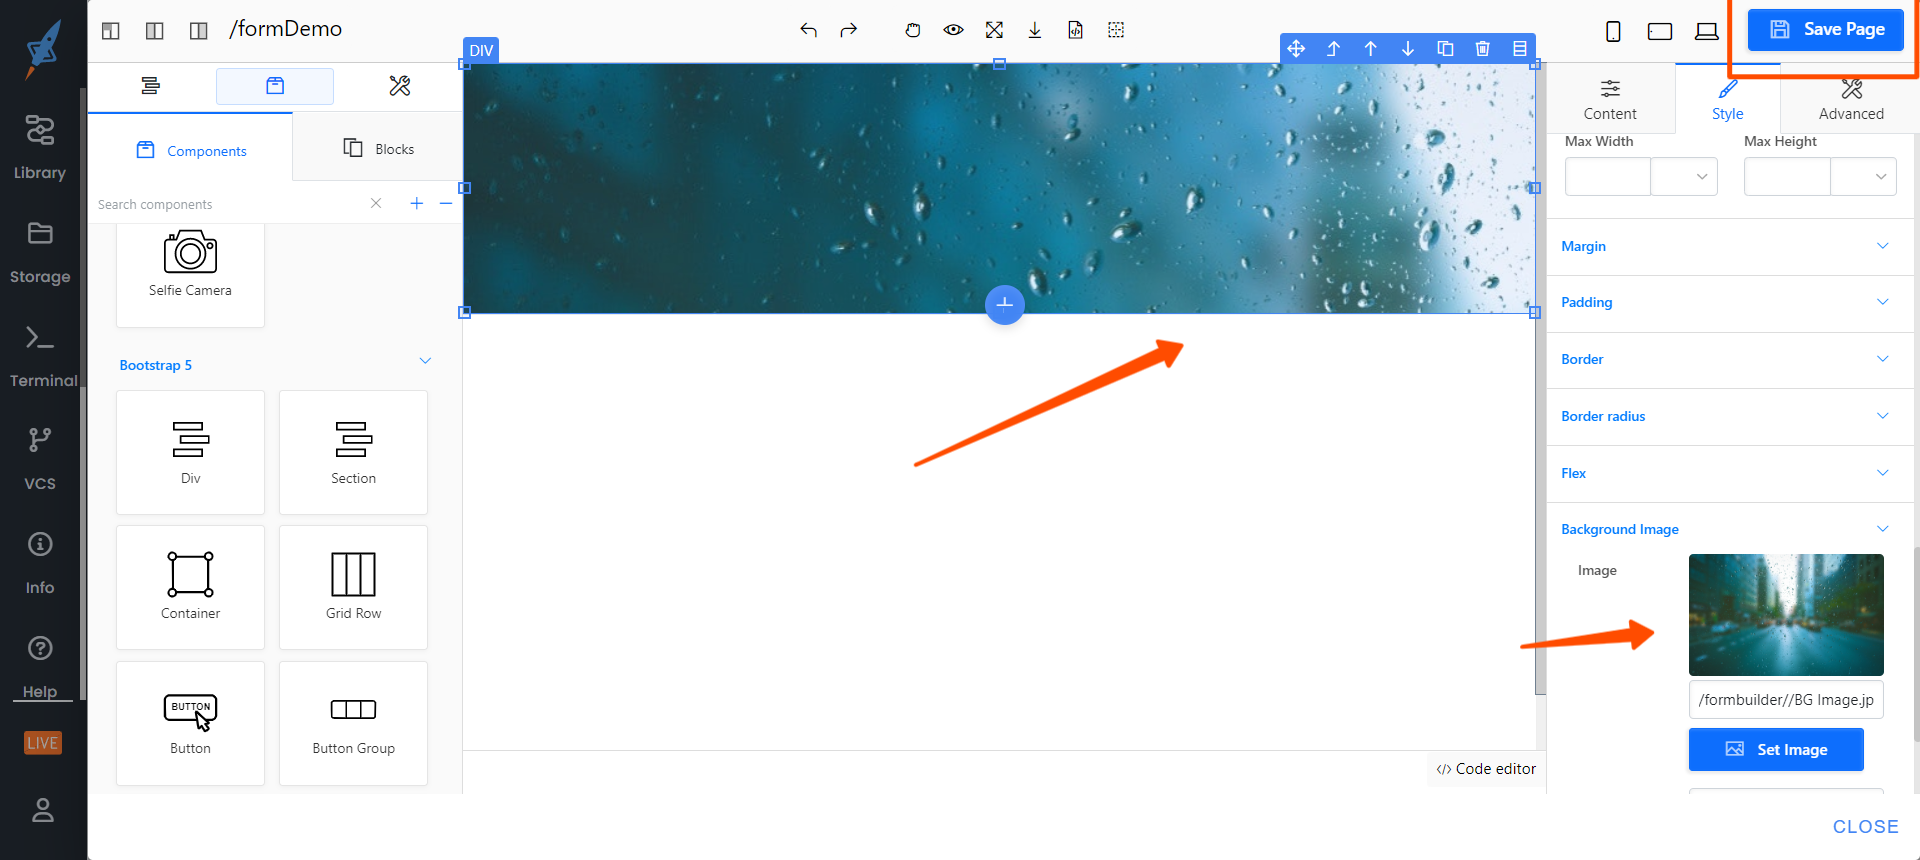
Step 3: Choose one div for the top image, as shown in the attached contact form page. Then, from the right panel's style tab, add the background image.
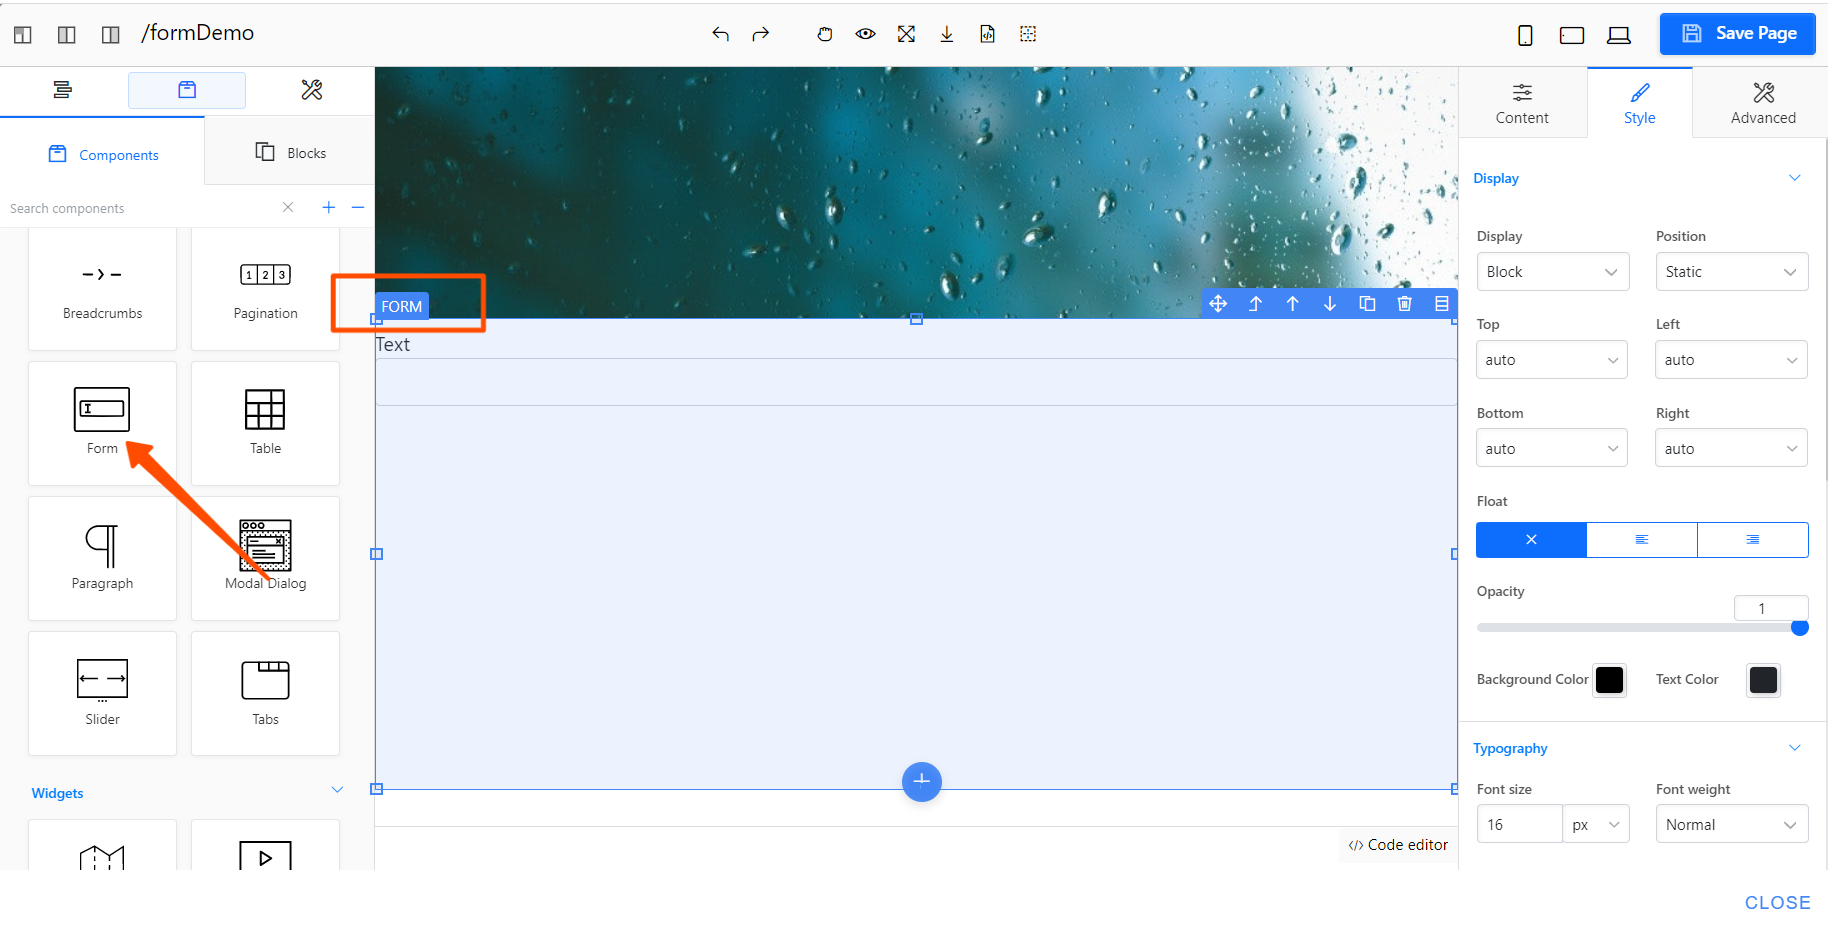
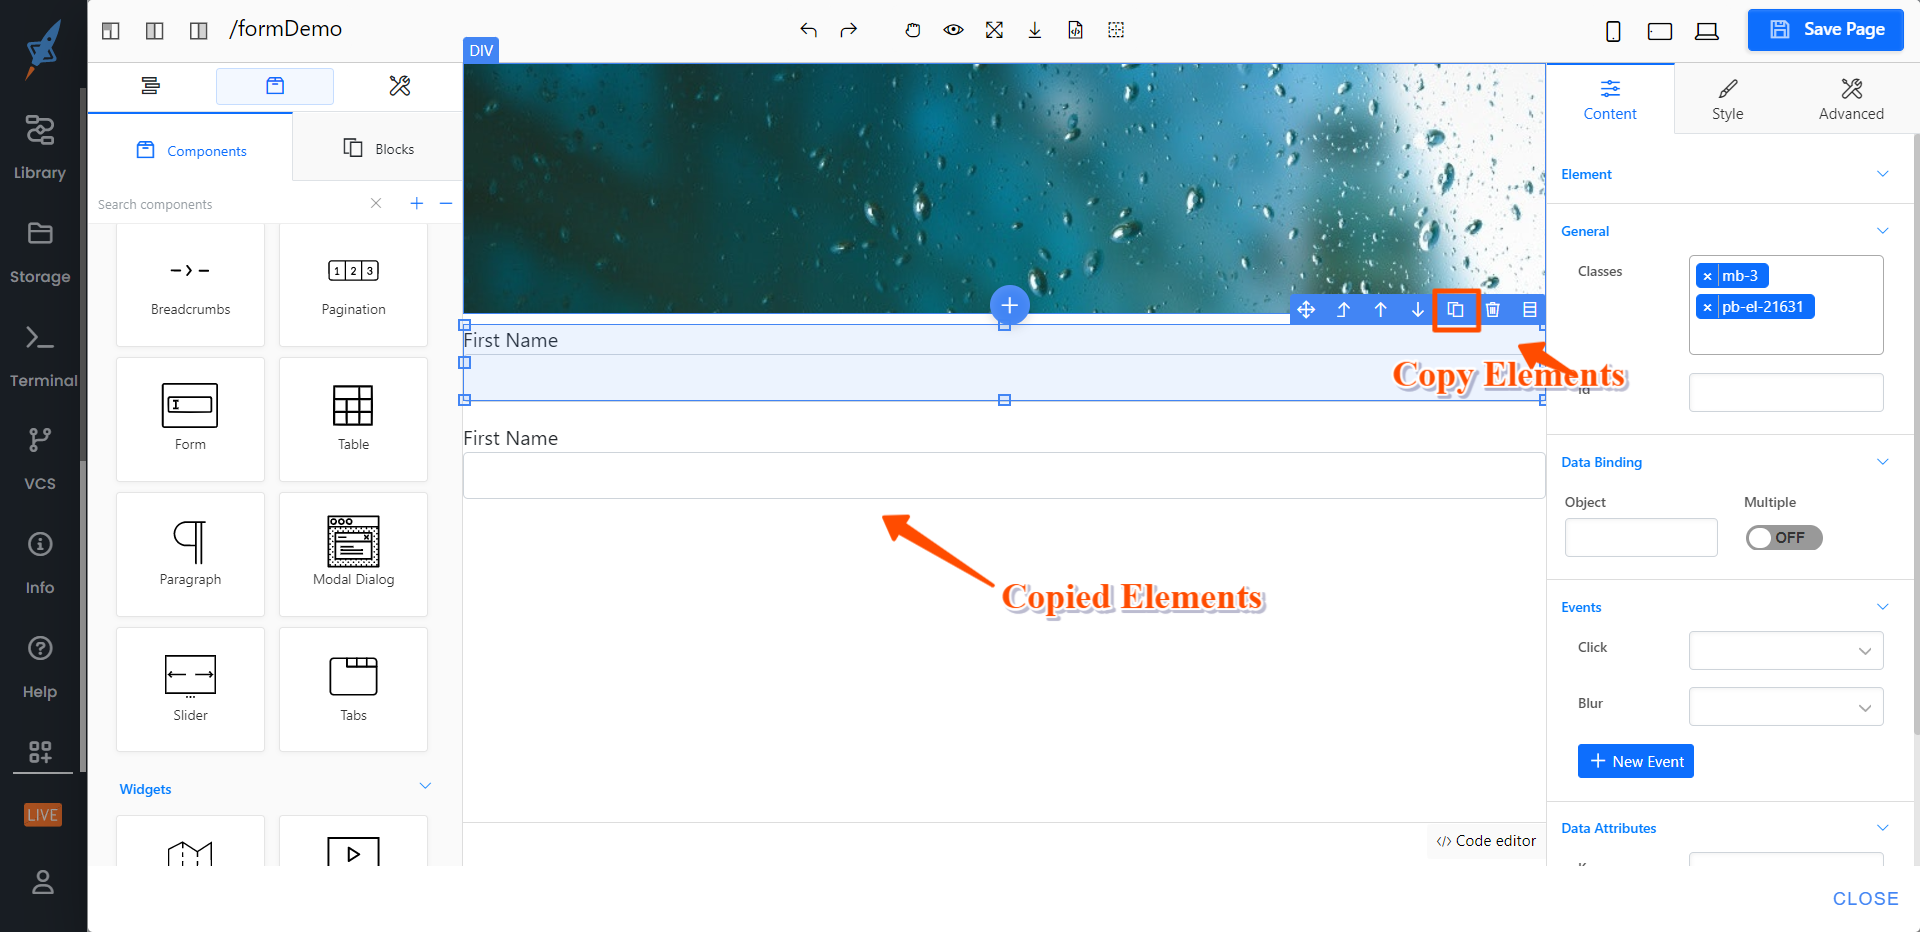
Step 4: Choose a form tag from the left and configure the details such as name and type for the selected input based on its label.
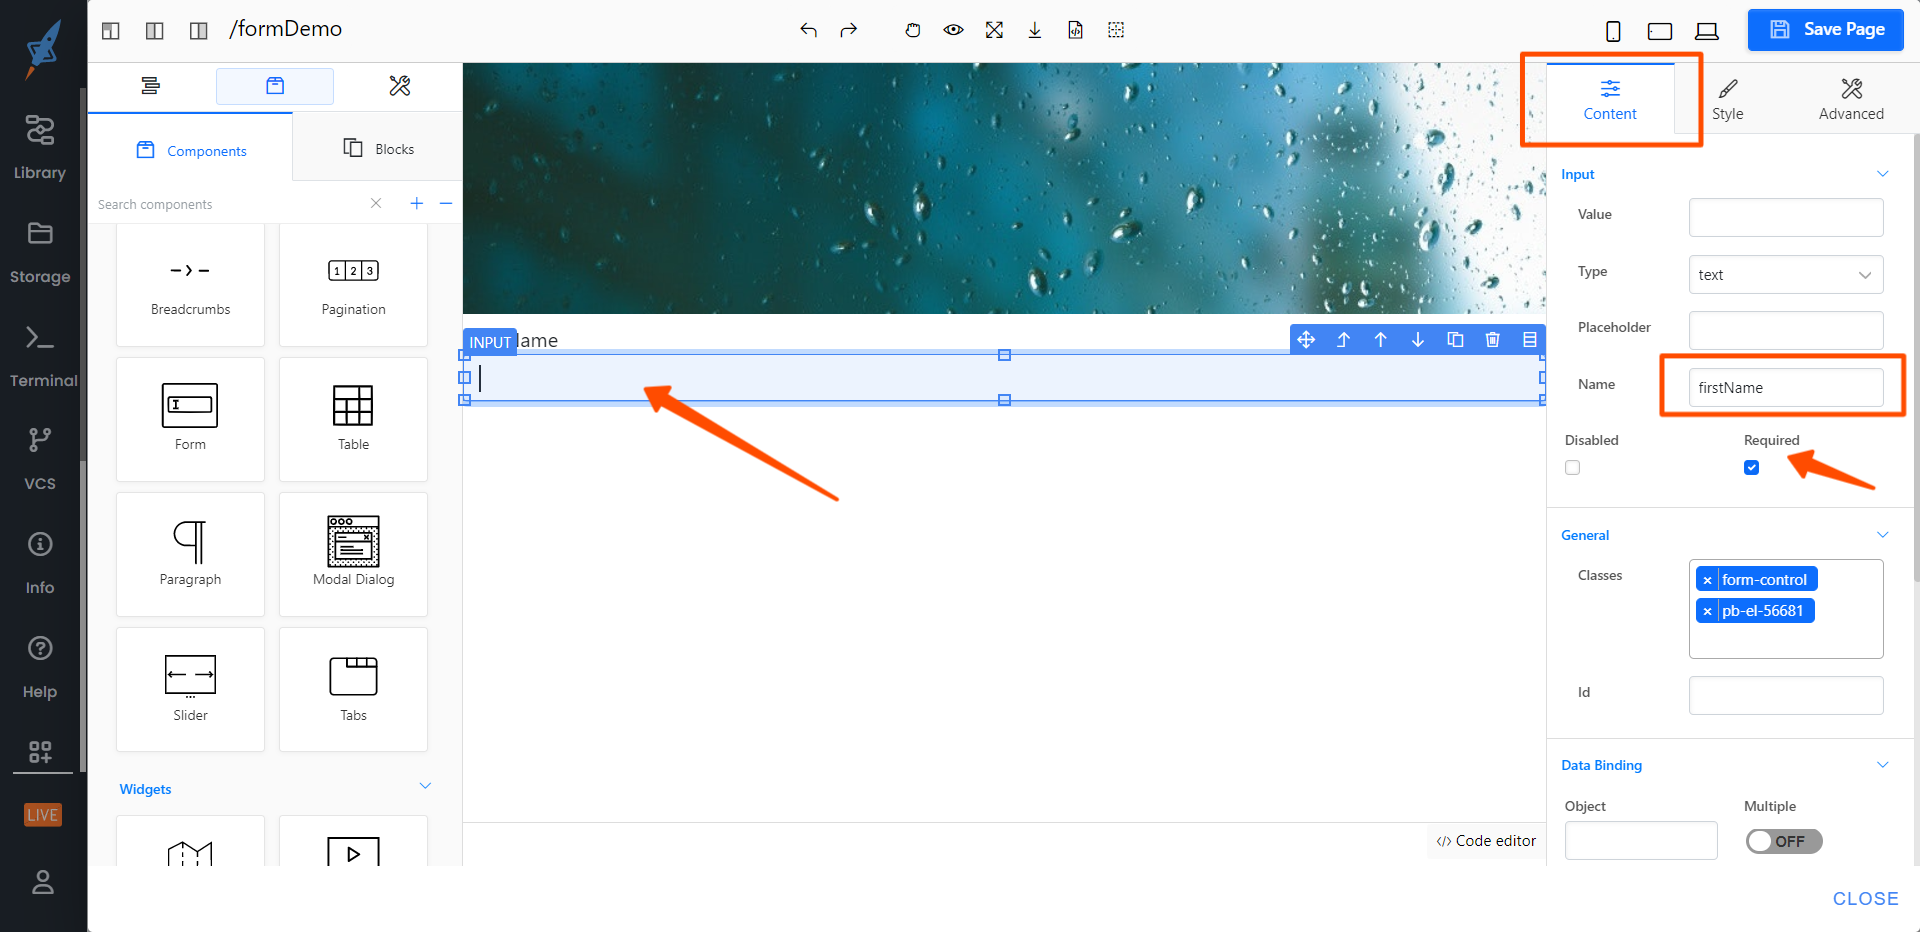
Then you can select the entire element (label + input), copy it, and change the configuration directly from the content tab.
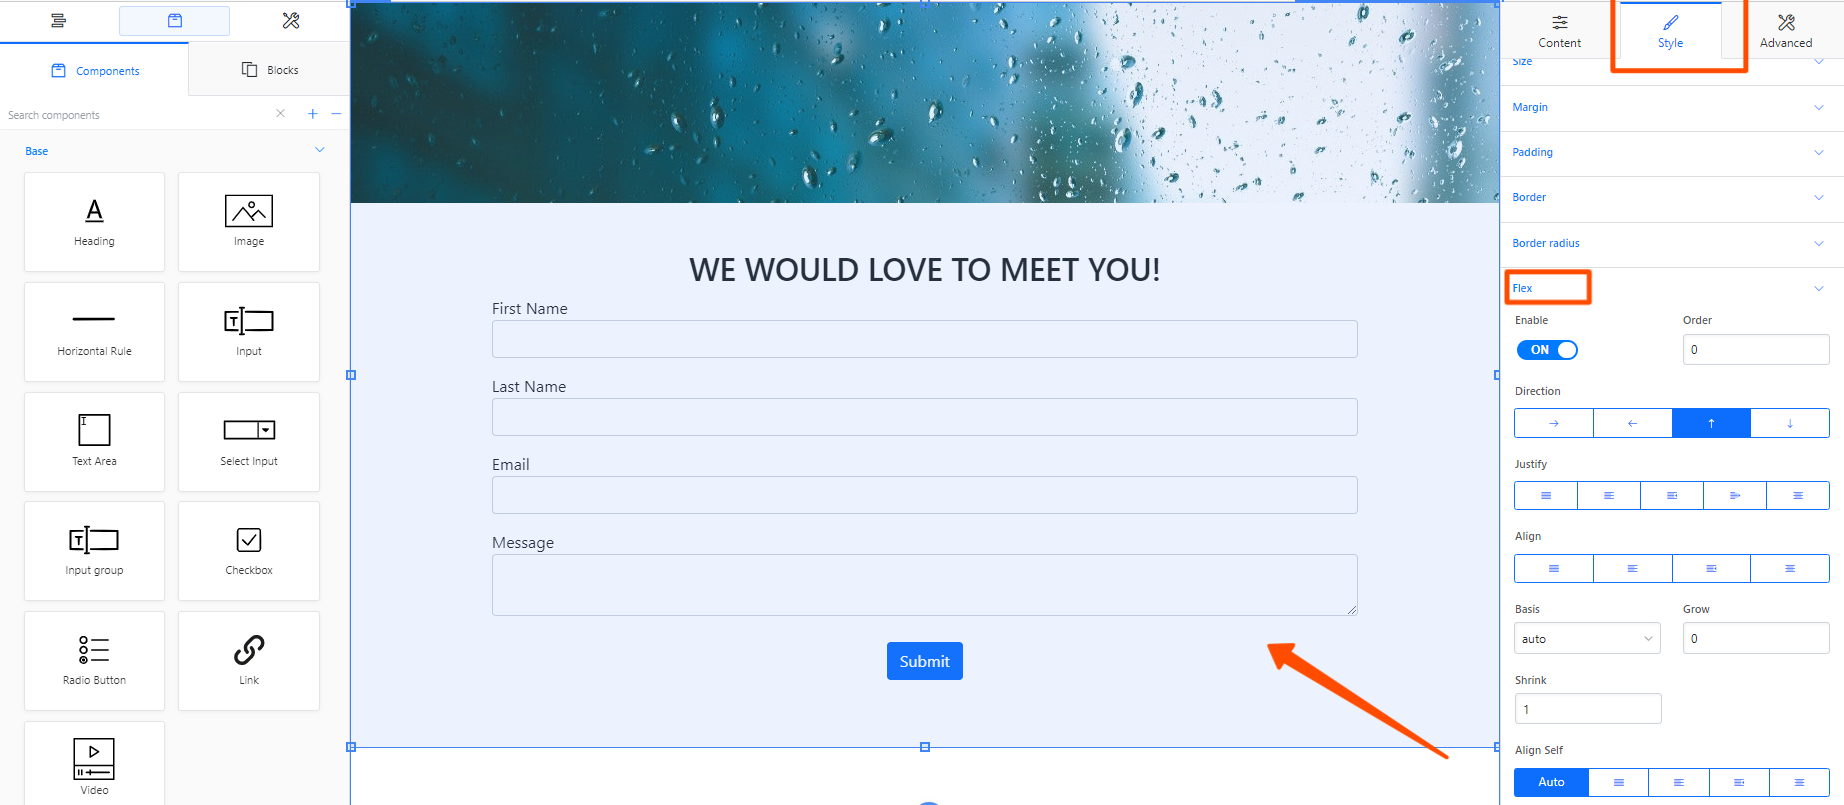
For styling, use the style tab. I've used a flex here.
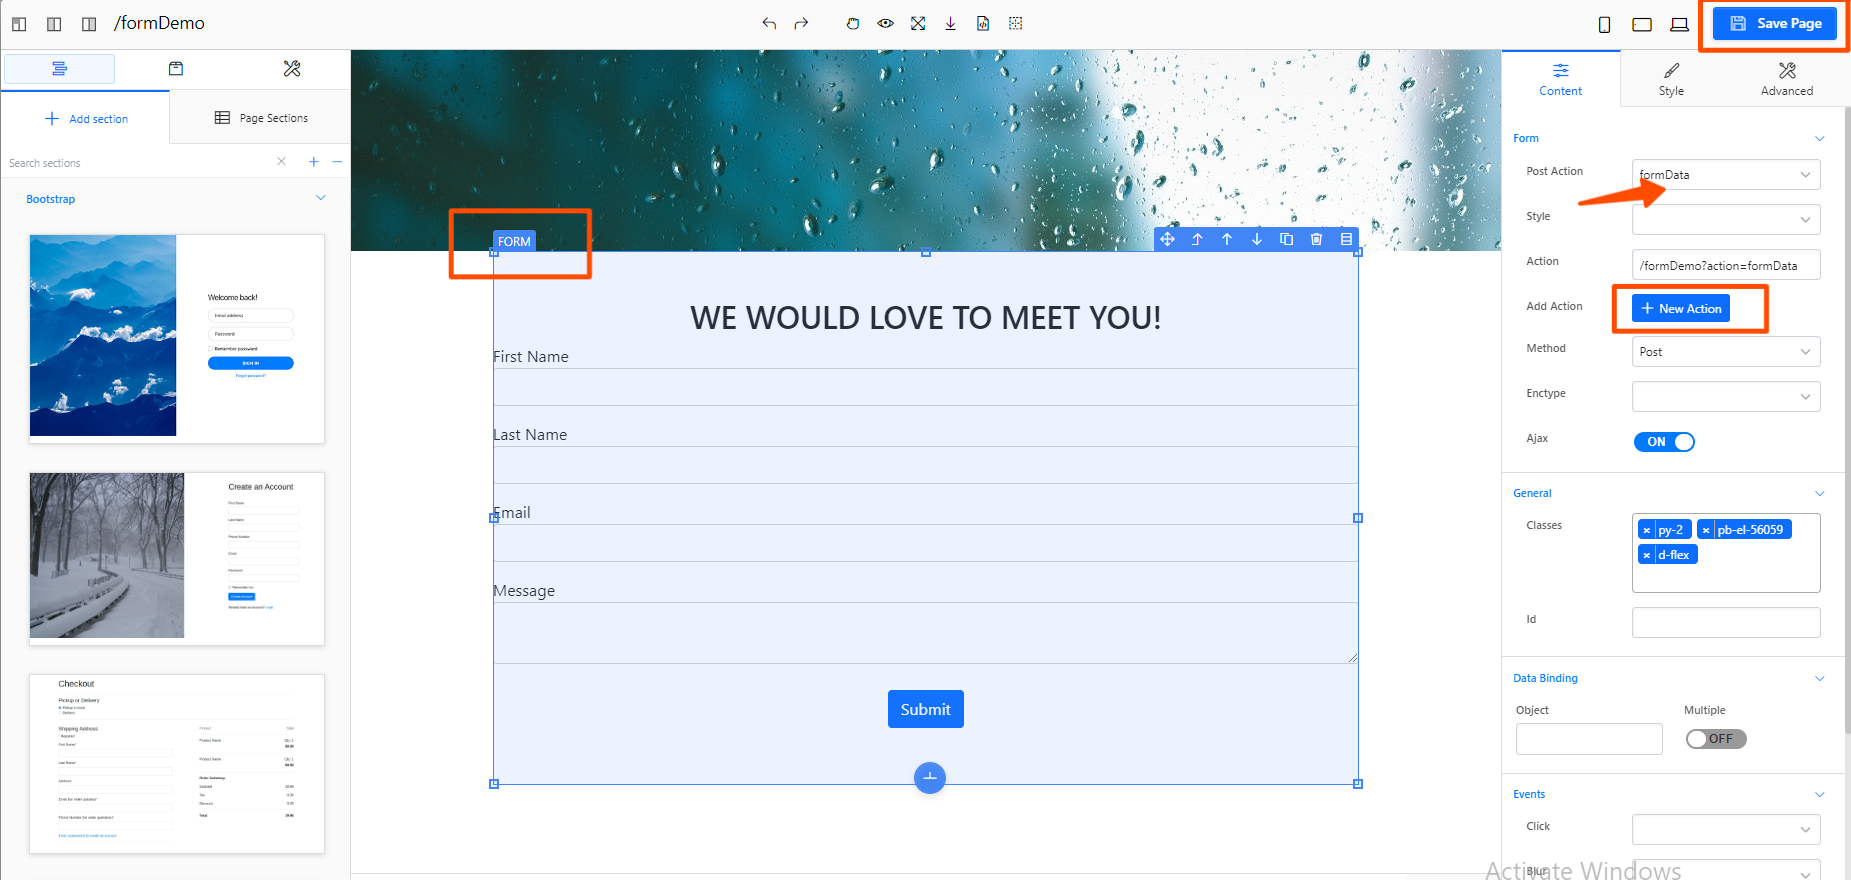
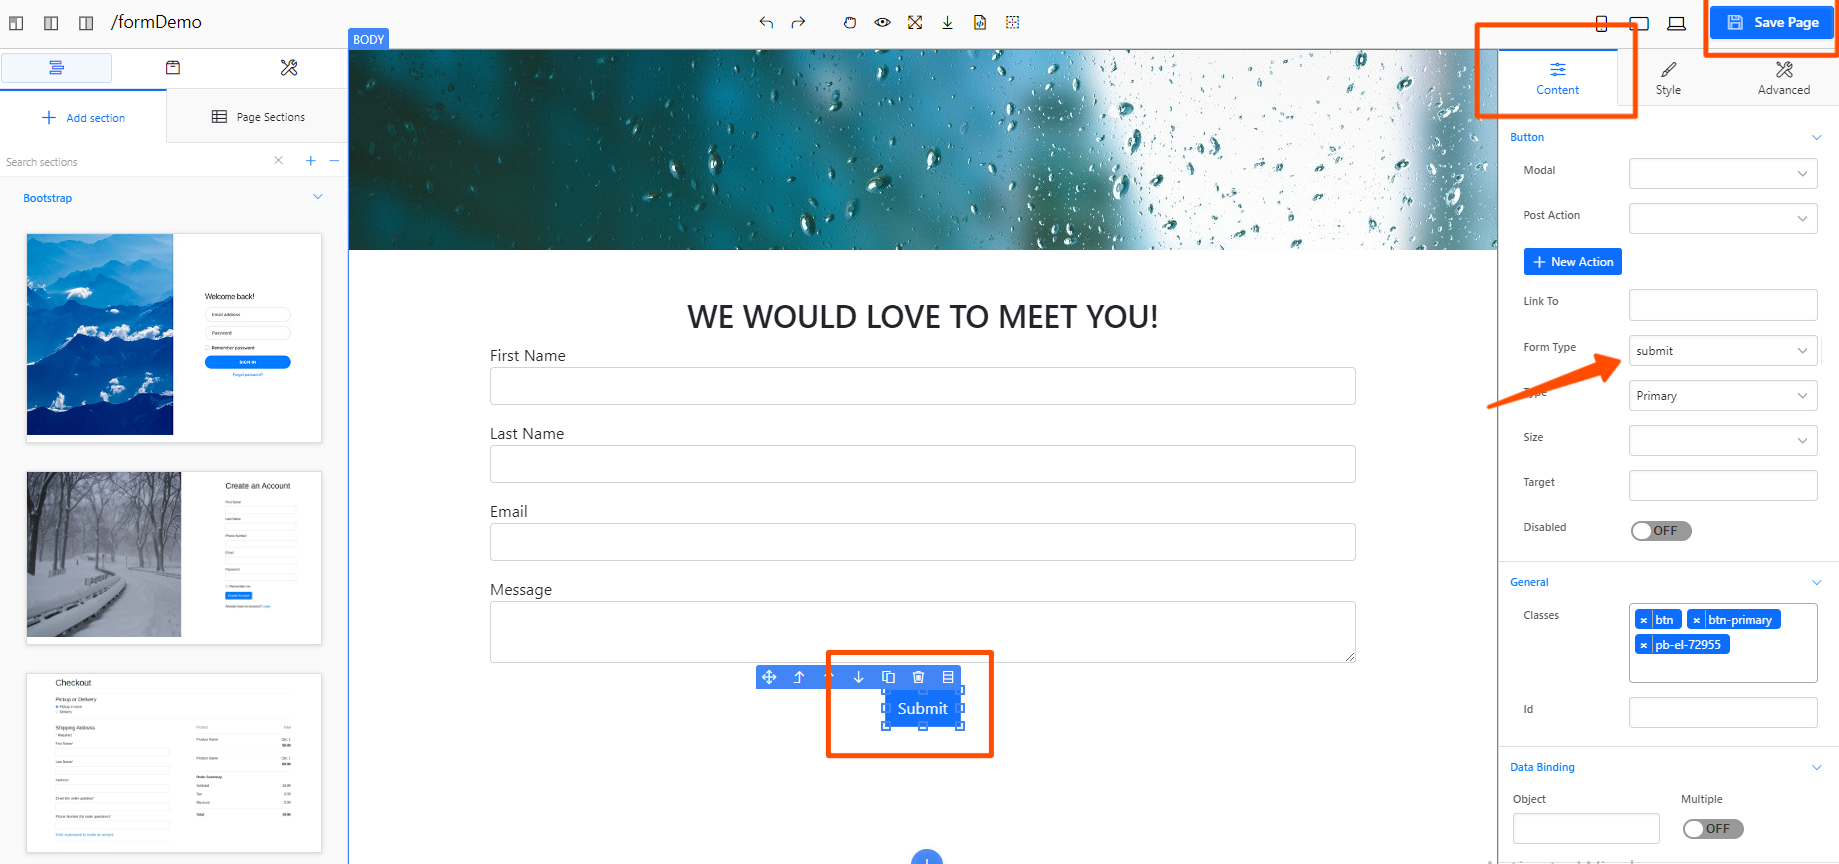
Step 5: Bind the form tag's submit event and save the data. And choose "Submit" as the form type on the form's submit button.
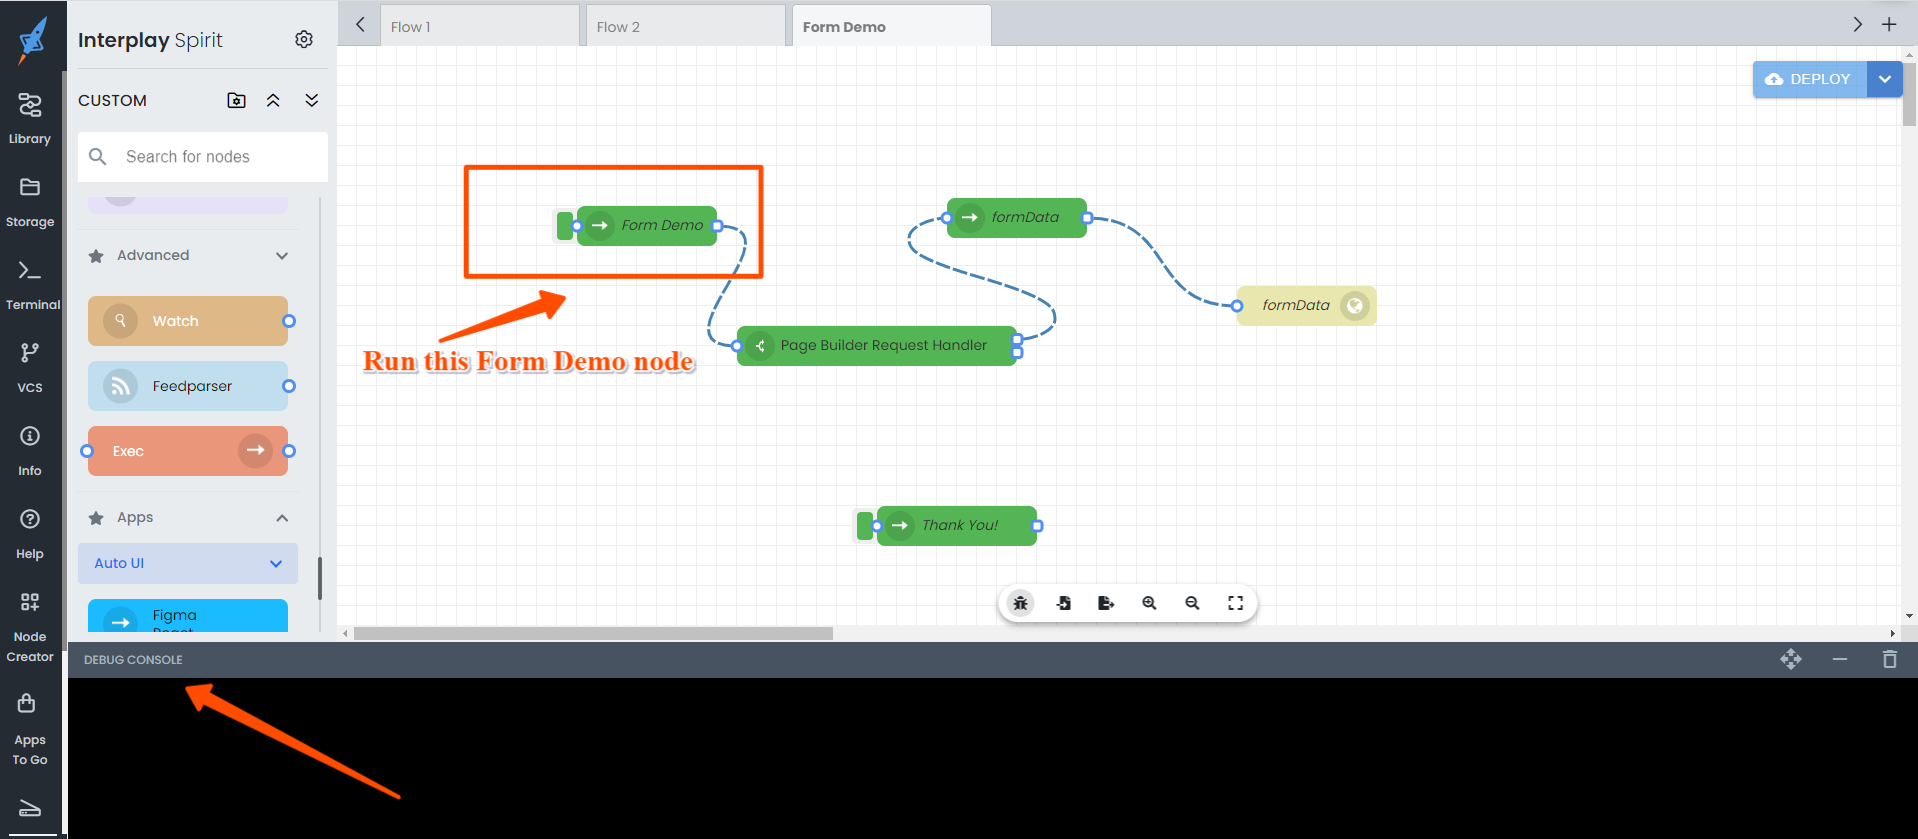
Step 6: After you save the details, it will automatically add the flow to your instance, as shown below.
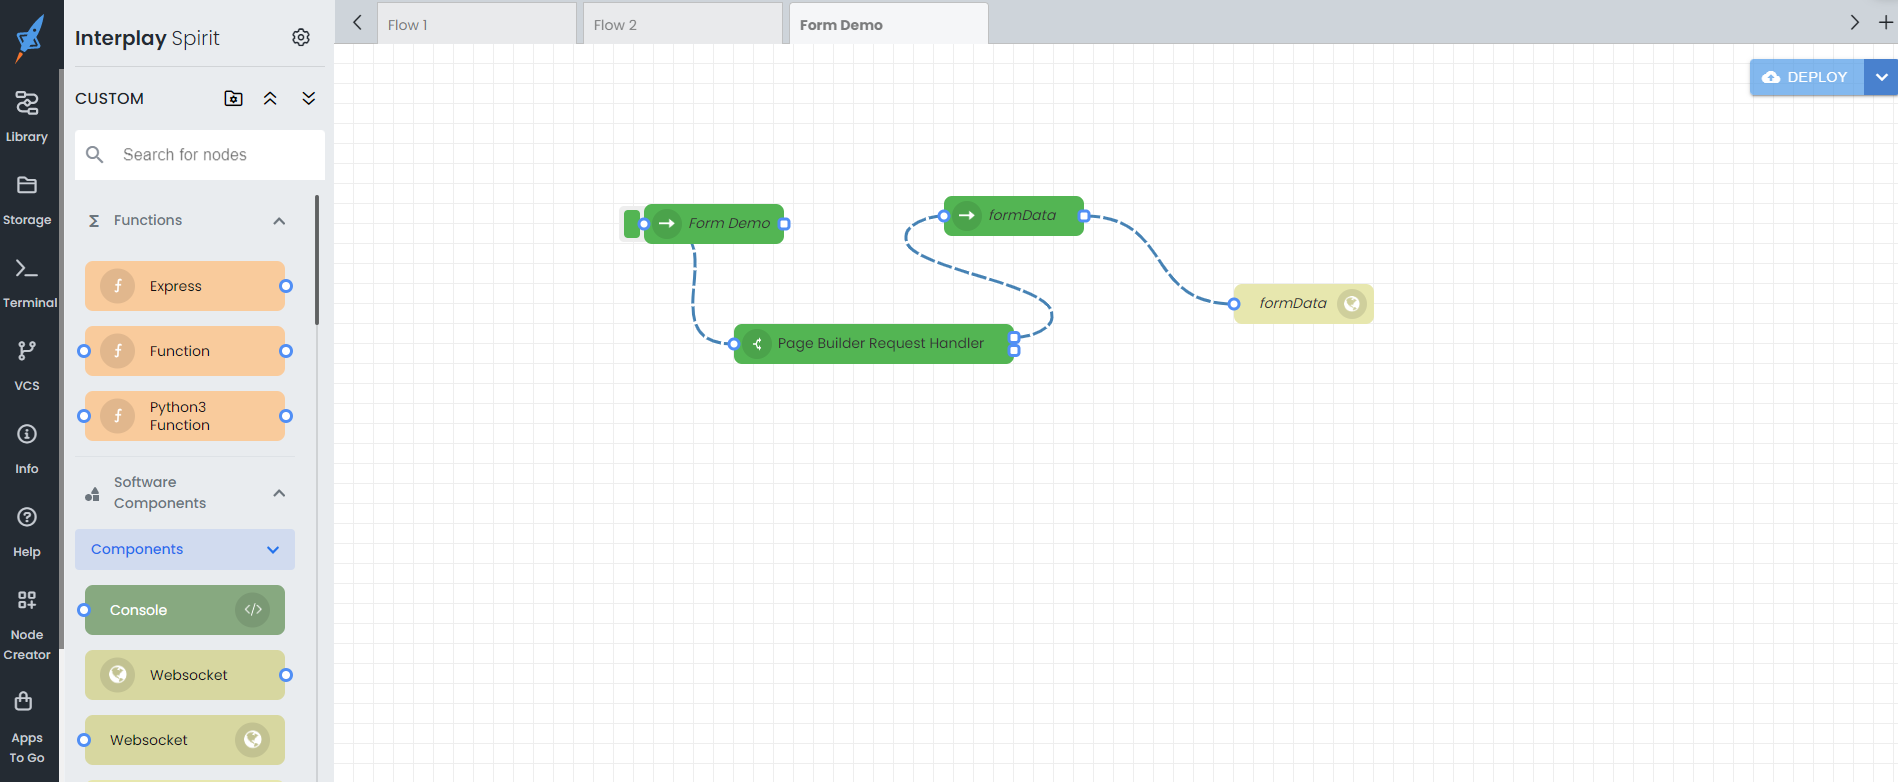
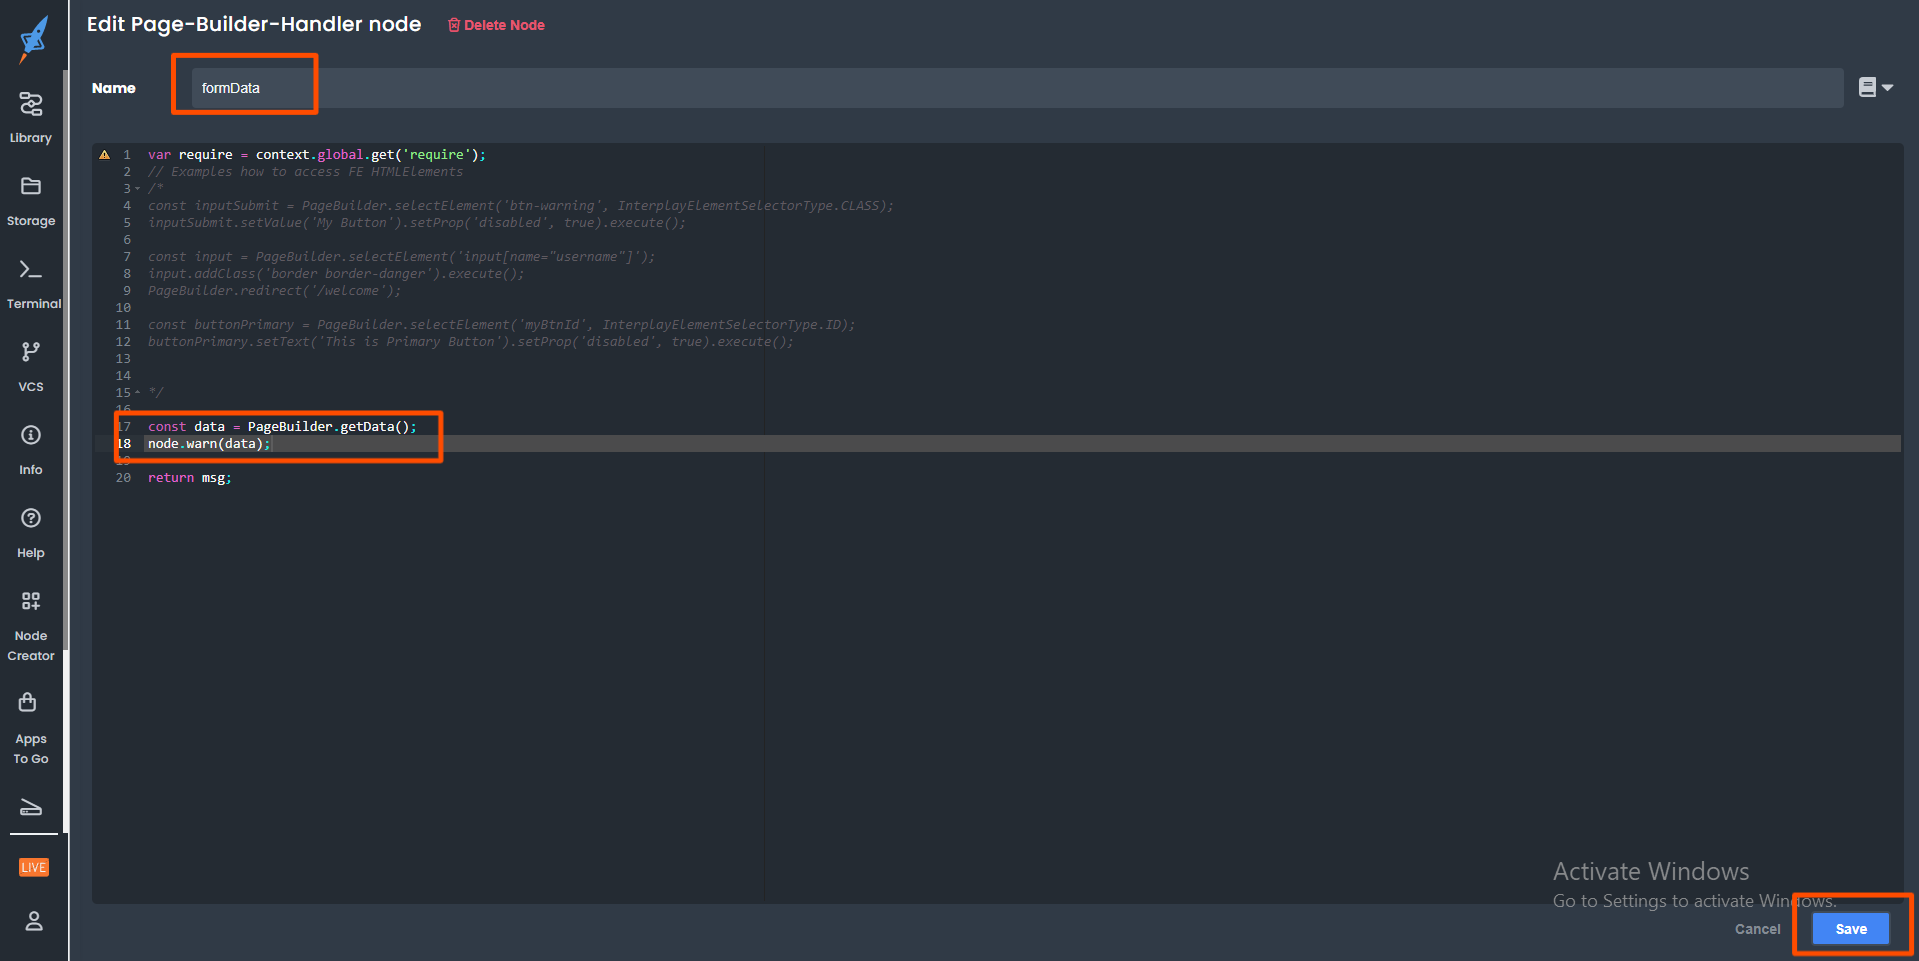
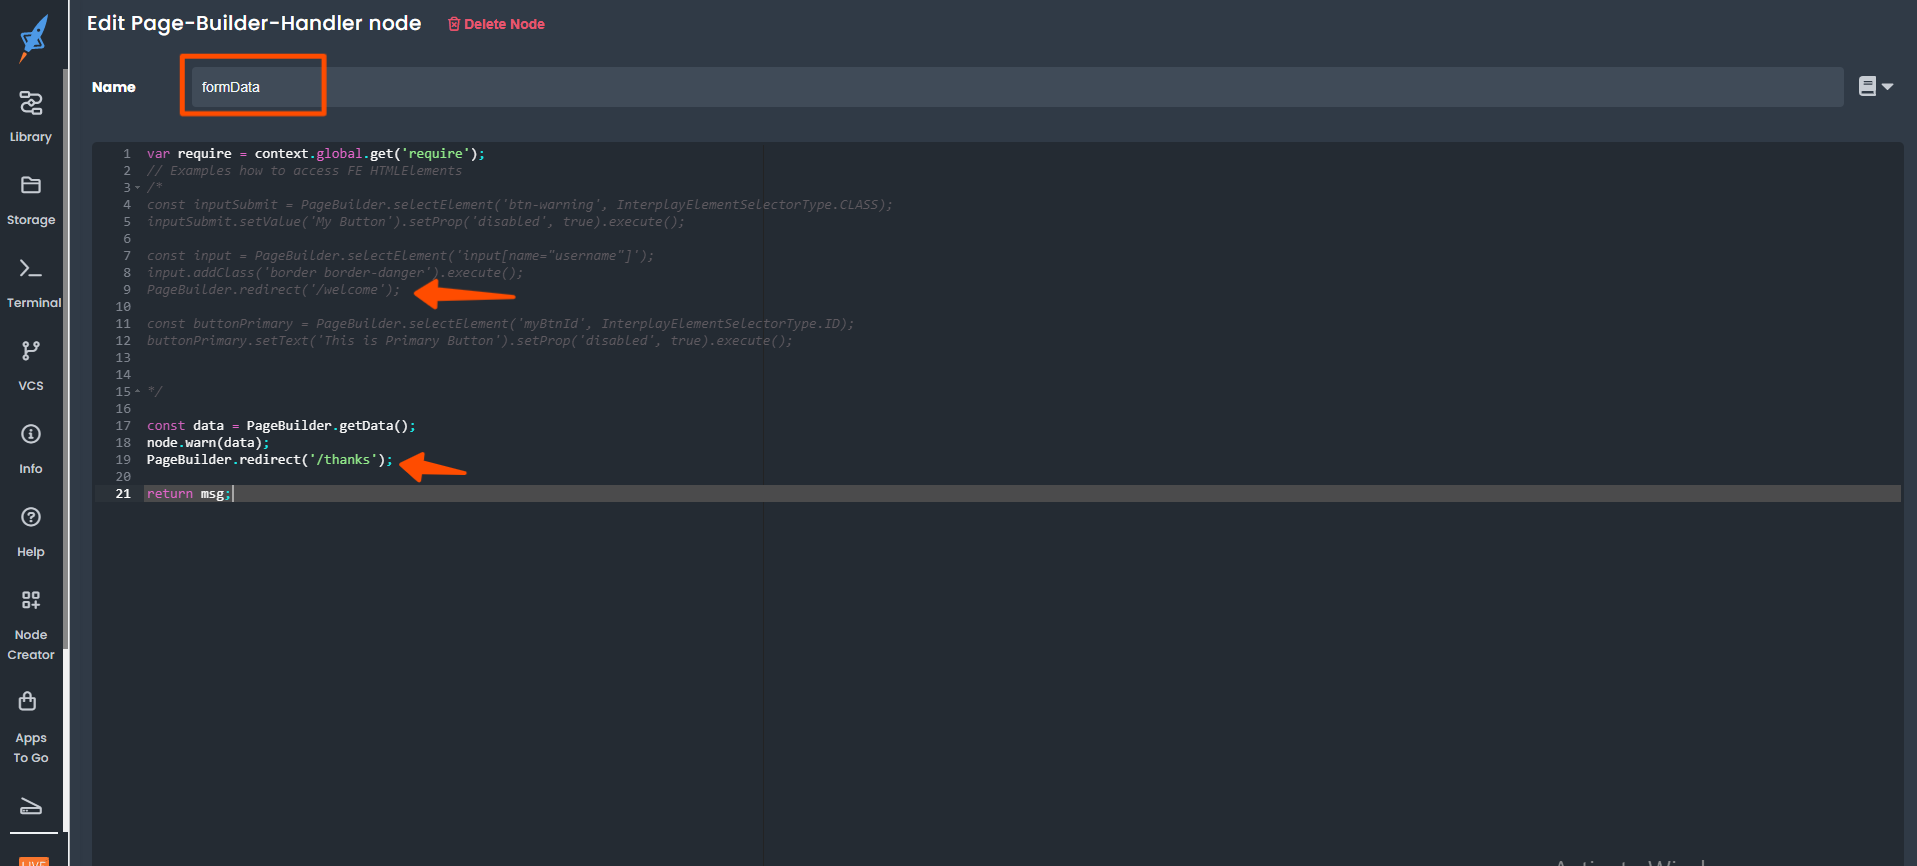
Edit the 'formData' node and uncomment the following code from the flow and deploy.
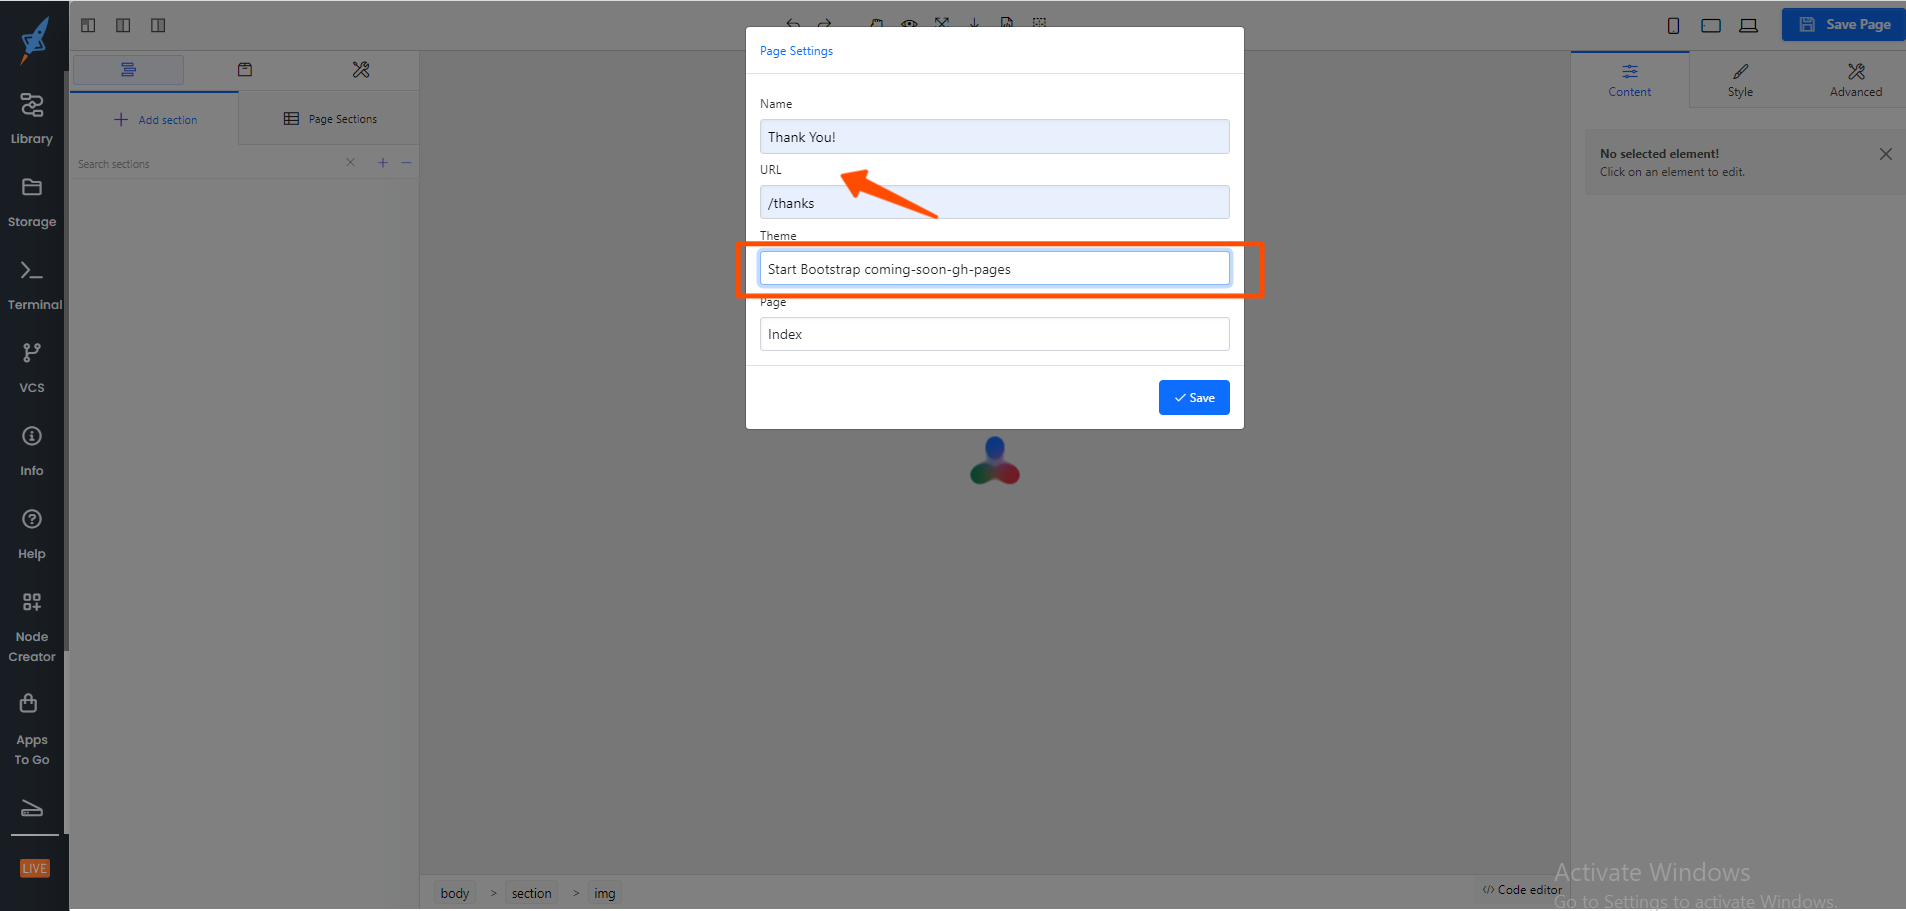
Step 7: Select the bootstrap theme to create a thank-you page.
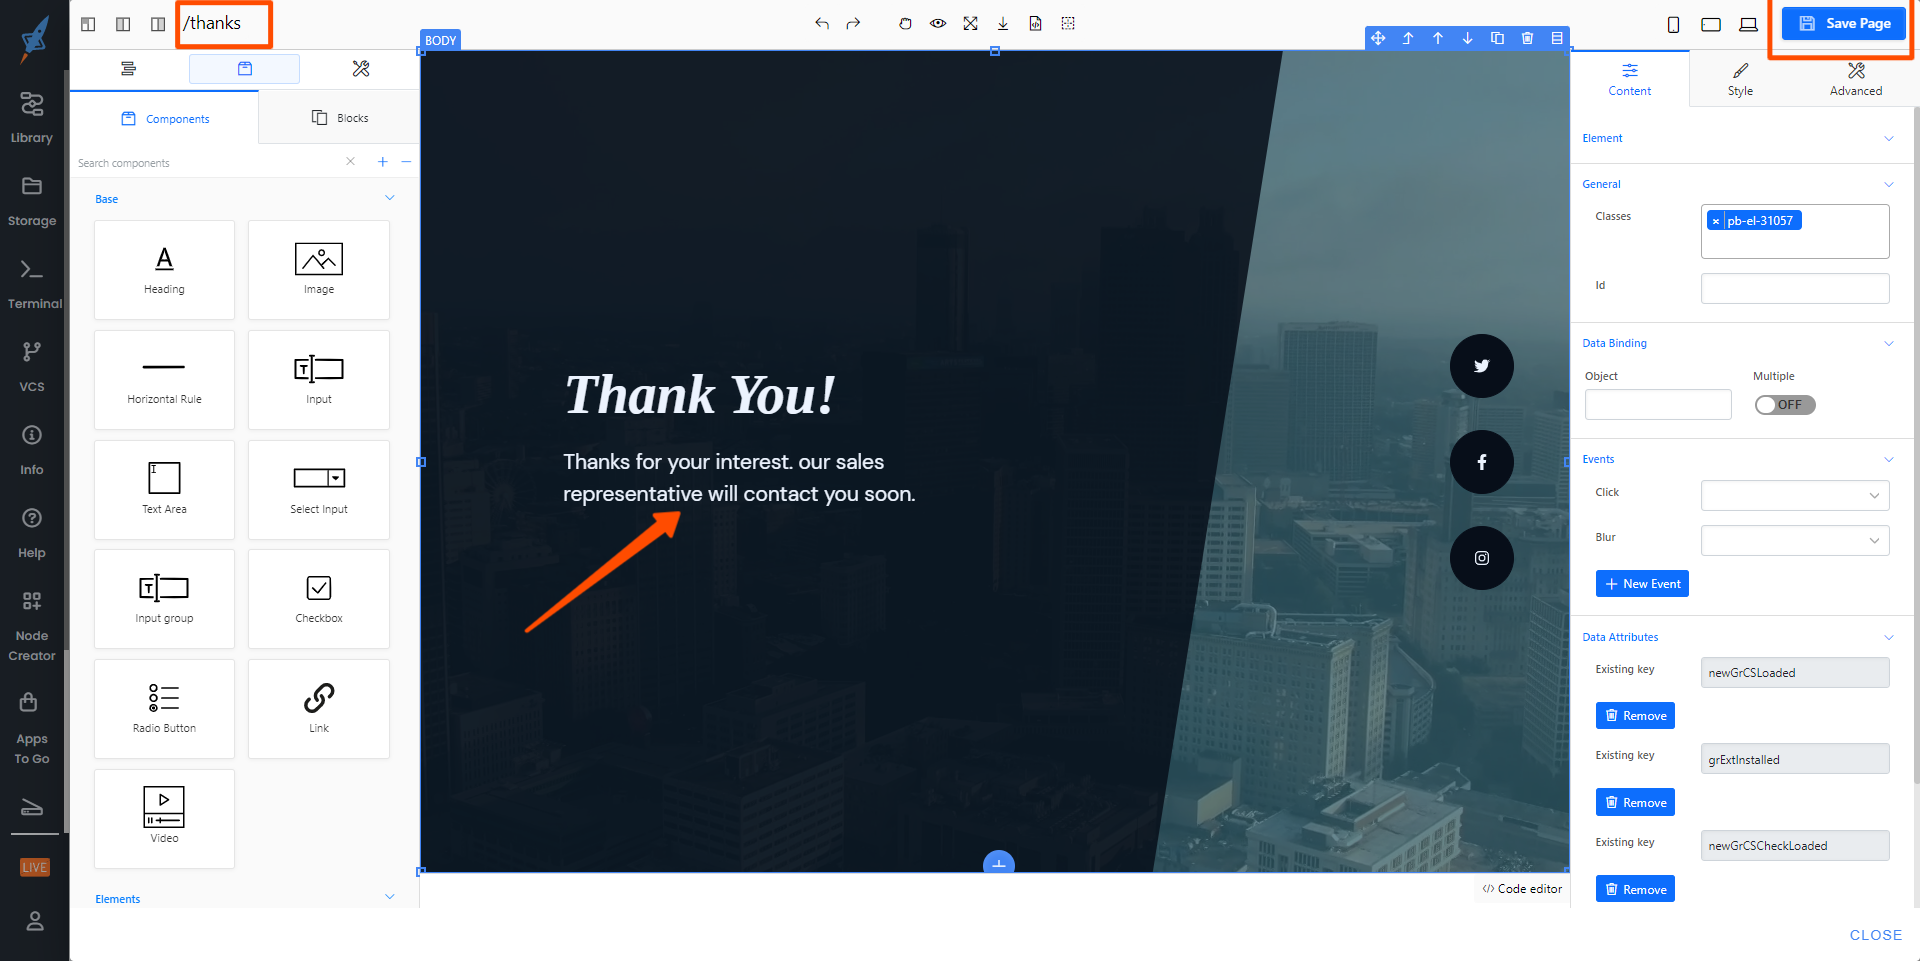
Step 8: Bind the thank you page after submitting the contact form.
Step 9: Run the form demo and submit it after filling in all of the details; the filled data can be found in the console log for reference.

Demo video of creating this contact form