The flow will allow you to input a video or live stream and object detection with tracking.
- A model will be selected for object detection.
- It'll accept a video or live stream as the input.
- User can select the object for detection
- selected object will be detected in the input video.
- Predictions can be visualized.
Here we will use “yolov8n’’ model to detect objects in the input video.
Scenario - 01
Depend = True
- For depend true user can use only two models.
-
The first detected object send to next model for detection.
- example : people + Hardhat detection. First identify the person then detect the hard hat from detected person.
- The first object can track and write the video. Next model result can't track only can be detected. Using the interface the results can be seen.
The complete flow for the scenario example {people tracking + hardhat detection}
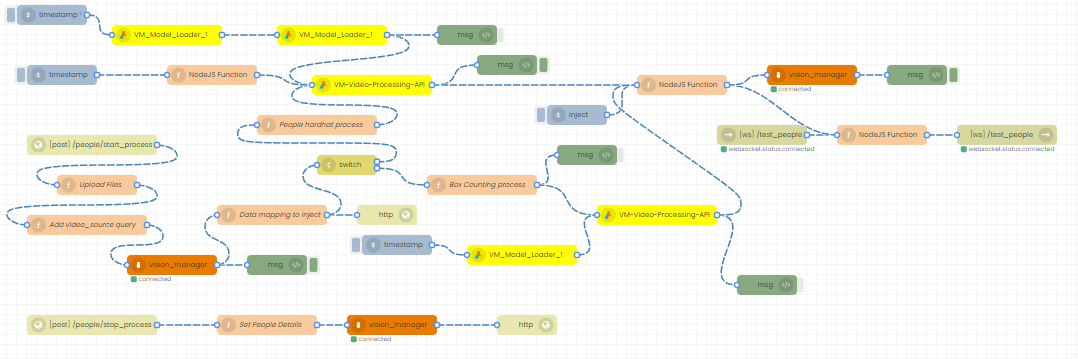
The complete flow includes interface nodes, database nodes etc. our consideration these main nodes.
Step 1 - Create the flow like in the below image by dragging and dropping the nodes.
Step 2 - Upload video (For RTSP inference ignore this step)
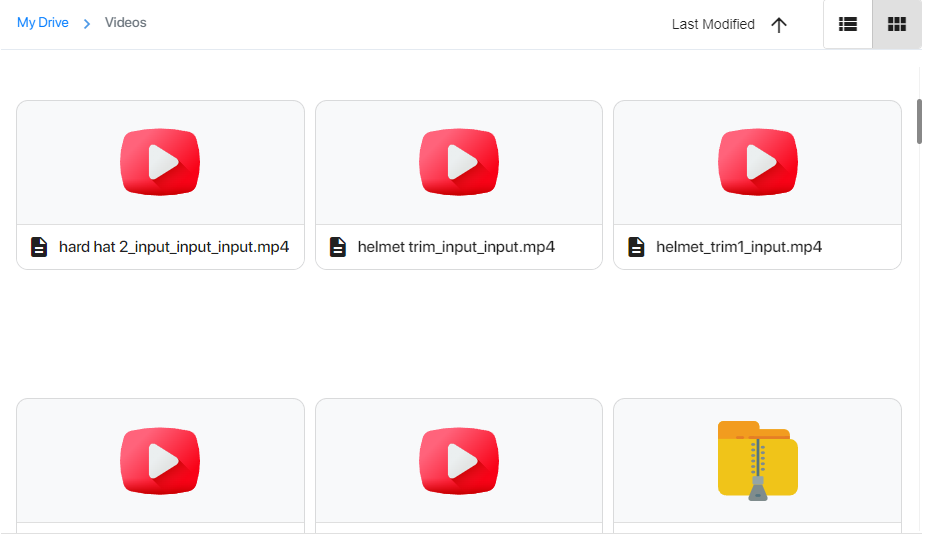
Check for the sample videos in the appropriate storage path (/Videos) or upload the video to be detected in that path.
upload the object detection weight file (Eg: yolov8n.pt) to the model path (/DetModels)
Step 3 - Node Configuration
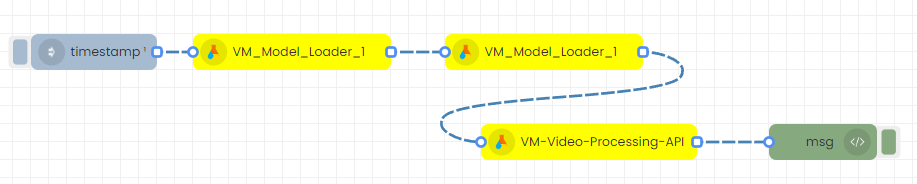
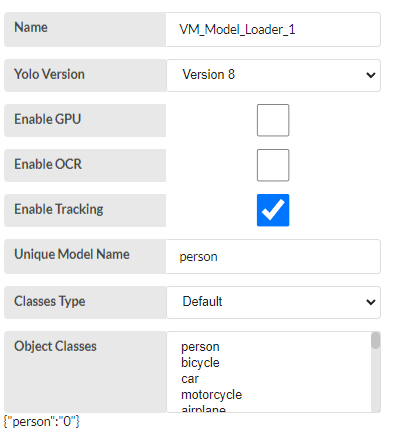
1.VM_Model_Loader_1
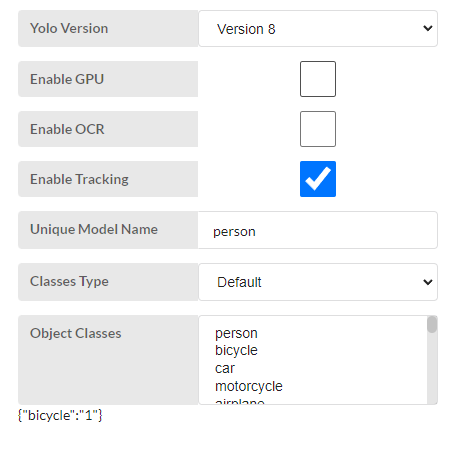
- Yolo Version - Select ‘model version’ from the drop-down. This is for run the default model for people tracking.
- Enable GPU - The inference run on GPU {Just select it}
- Enable OCR - No need to extract the text. No need to select.
- Enable Tracking - people have to be tracked. Therefore click option box.
- Unique model name - Give a name for the model and press enter. “Person”
-
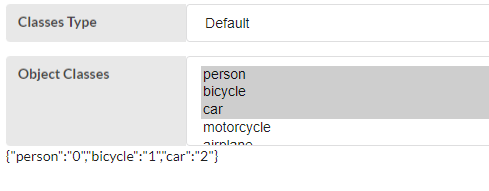
Classes Type - Select from dropdown
-
Default
- Model default version.
-
Classes comes from a dropdown, user can select from the options.
-
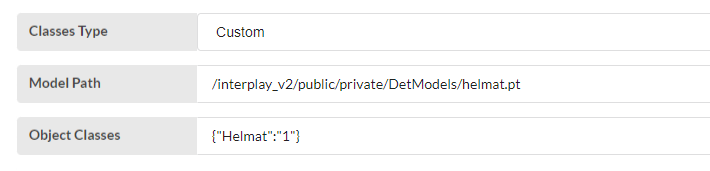
Custom
- User has to upload the model to the storage and give the model path
- The classes are given from the user in this format. {"Box":"0"}.
-
Default
- for our application we have to select default and in the object class people has to be selected.
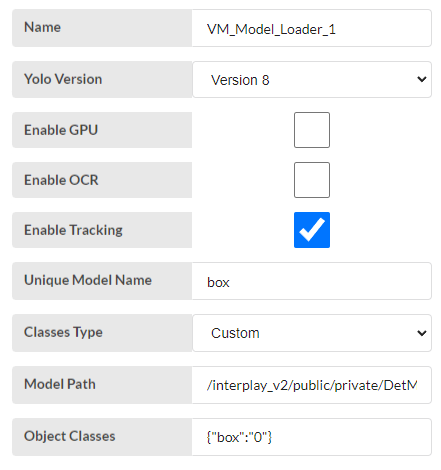
2.VM_Model_Loader_1
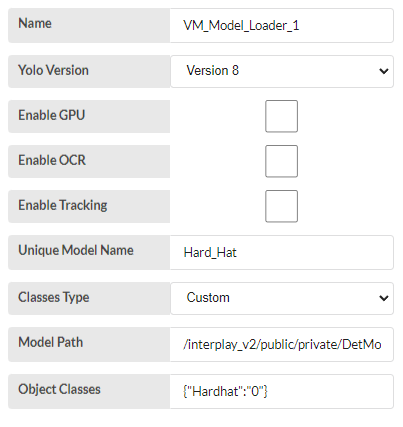
This is our 2nd model for Hard hat detection. here we can't track because input is cropped image that detected by first model. The model is custom model.
- Follow the same configuration.
- Classes Type - select custom
- Unique model name - “Hard_hat” for given name. user can give any name that doesn't same as previous name.
- Model_path - For the custom classs we have to give model path. The model has to stored in the interplay storage that mentioned above.
- Object classes - User has to give the classes also. The classes can be identified from this code. “model.names.”, The format should be follow like this {"Hardhat":"0"}.
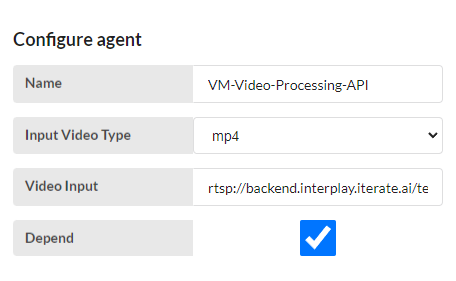
VM-Video-Processing-API
-
Input Video Type - Select type of the video from the drop-down.
- mp4, rtsp, webm, mpeg
-
Video Input - Give the video path
- The video has to upload into the storage and has to given the path.
-
Depend - User can select option
- Here user has to use two model. once detect the object only from the 1st model output.
- select the depend option, the first output gives to 2nd model for process.
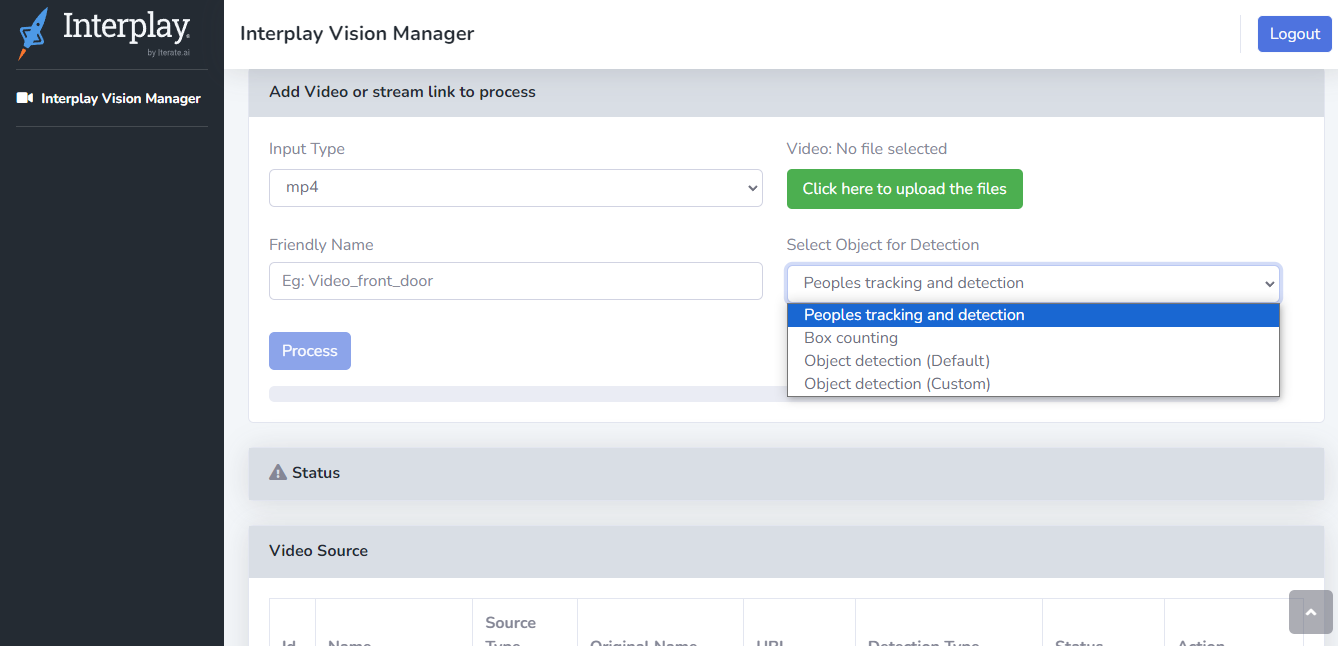
Step 4 - Interface
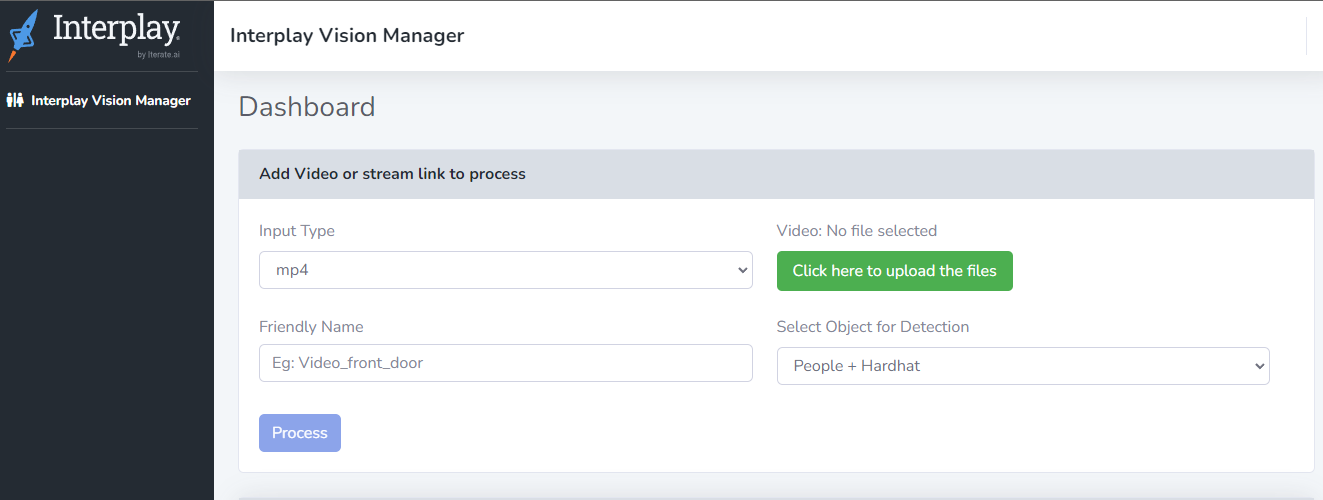
The interface can be used for object detection and can be seen the result also.
- Input Type - Here, the type can be selected like mp4, or rtsp, mpeg, webm
- Click here to upload the files - you can use the button to upload video
- Friendly Name - Give a name for easy to handle
- Select Object for Detection - There are two options for select from dropdown.
- People+Hardhat
- process - Finally if the button pressed, the processing starts.
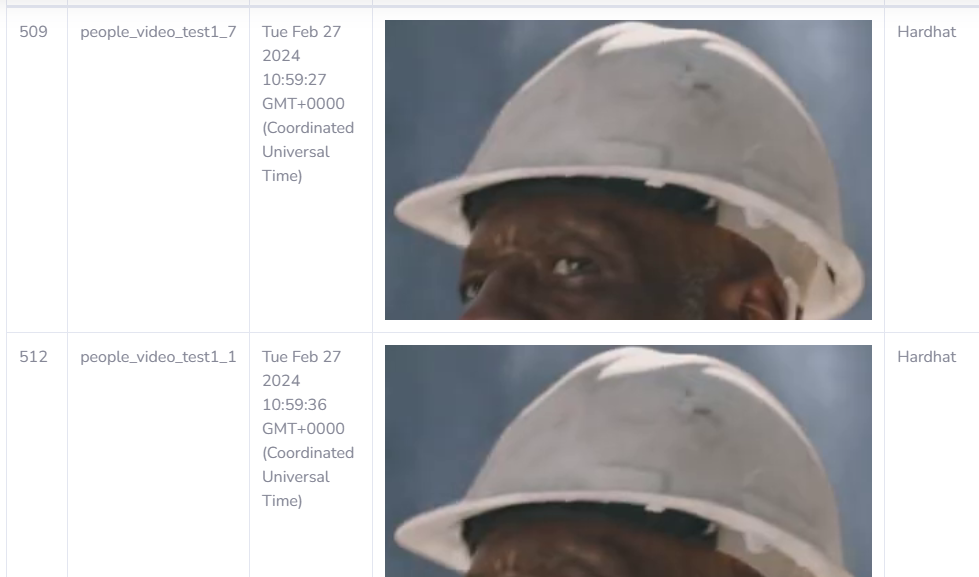
Result Page for people count + Hard hat detection

- Original Name - The name of the uploaded video
- Total people count - The count of people who passed the video
- Latest Frame - The last frame that processed for detection
- Detection with images
- ID - The track ID of detected object
- Date and Time - The current date and time with GMT
- Snapshot - detected object images
- Object Detection - Hard hat detections
Snapshots
Scenario - 02
Depend = False
Box Counting
This flow for counting the warehouse boxes.
- Single model is enough for this purpose. So, Single “VM_Model_Loder_1” node a “VM_Video_Processing_API” node is enough.
The flow is given below.

The model configuration.
VM_Model_Loader_1
- Yolo Version - This is for default so anything can be selected.
- Enable GPU - User can select or not. if selected inference run on gpu.
- Enable OCR - No need to select.
- Enable tracking - select the enable tracking for count the boxes and track the boxes.
- Unique Model Name -User any name can be given. Here type the name. “box”
- classes Type - select custom. Because the default model can't identify warehouse boxes.
- Model Path - The trained model has to be stored in a above mentioned place and give the path here.
- Object Classes - From the model give the class and index like the image shown.
VM_Box_Counting
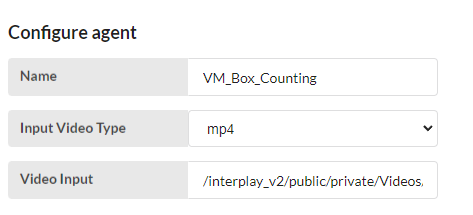
- Input Video Type - User has to select “mp4” or “rtsp” or “http”.
- Video Input - The video has to stored in the above mentioned place and give the path here. or streaming select "rtsp" then give the link in the given place.
Finally deploy the flow and can be run.